
A Complete Home Remodel Guide for Real Estate Agents in the PNW
Table of Contents
Explore the sections below to navigate this comprehensive guide for real estate agents in Portland and Vancouver. Click any topic to jump directly to that section.
- 0. Introduction & Scope
- 1. Understanding the Local Building Stock & Climate Context
- 2. What to Look for During a Showing
- 3A. Top Renovations With the Highest ROI in the PNW
- 3B. Common Problem Areas & Recommended Improvements
- 4. Timeline Expectations & Project Phases
- 5. Cost Benchmarks & Local Pricing Realities
- 6. Warning Signs / Red Flags to Watch For
- 7. Local Permitting & Code Considerations
- 8. Sample Case Studies (Local Scenarios)
- 9. Agent Toolkit & Resources
- 10. Conclusion
- 11. Frequently Asked Questions
Buying and selling homes in the Pacific Northwest isn’t just about price and square footage; it’s about understanding the story behind each property. From the charming 1920s Craftsman in SE Portland to a mid-century ranch in Vancouver Heights, every home in this region has its own quirks, hidden strengths, and renovation opportunities.
This guide was created specifically for real estate agents in Portland, Oregon, and Vancouver, Washington, who want to speak confidently about home condition, renovation potential, and remodeling ROI. It’s designed to help you go beyond surface-level showings, so you can identify red flags early, educate clients on what’s worth fixing, and position yourself as a trusted advisor for buyers and sellers navigating older homes.
In this guide, you’ll learn how to:
Recognize common signs that a home needs work before the inspection report.
Speak knowledgeably about timelines, costs, and livability upgrades.
Identify which renovations offer the strongest ROI in the PNW.
Explain the permitting process clearly across both Oregon and Washington.
Link clients with trusted remodeling professionals when projects arise.
Throughout this real estate agent guide, you’ll find links to in-depth resources from our blog that expand on specific topics like kitchen layouts that work in PNW homes, how to plan a home addition in Vancouver, and permitting tips for Portland homeowners.
Whether you represent the buyer evaluating potential or the seller preparing to list, this guide is your field manual for navigating PNW homes, from foundation to finishes.
1. Understanding the Local Building Stock & Climate Context
The Portland–Vancouver metro area is rich in architectural history, but with that charm comes complexity. Many homes across Multnomah and Clark County were built long before modern building codes, energy standards, or moisture management practices. Understanding these structures, the regional climate that tests them, and Portland architecture styles is essential for real estate professionals advising clients on home condition or remodeling potential.
1.1 Common Home Eras and Architectural Styles
Pre-War (1900–1940): Craftsman, Bungalow, and Foursquare
These homes define many of Portland’s inner eastside neighborhoods, from Laurelhurst to Sellwood, and parts of downtown Vancouver. They were built with heavy timber framing, full-dimension lumber, and plaster-on-lath walls, often featuring ornate millwork, covered porches, and built-in cabinetry.
Strengths:
Solid wood framing and flooring that has stood the test of time.
Exceptional craftsmanship with details like leaded glass, wainscoting, and coffered ceilings.
Timeless curb appeal that fits Portland’s historic character.
Weaknesses:
Outdated knob-and-tube wiring and galvanized plumbing.
Limited wall insulation and single-pane windows make them drafty and inefficient.
Plaster-and-lath walls that complicate electrical or plumbing updates.
Possible presence of lead paint or asbestos in flooring and insulation materials.
Common agent insight: Buyers are drawn to the authenticity and character of these homes, but often underestimate the cost and complexity of modernization. Agents can help by pointing out what’s original versus what’s been upgraded, for example, modern wiring behind historic plaster, or a finished basement with proper egress windows.
Mid-Century (1945–1970): Ranch, Split-Level, and Early Contemporary
After World War II, housing expanded rapidly, especially in Vancouver Heights, Lake Oswego, and Beaverton. Builders moved toward simpler framing, slab-on-grade foundations, and low-pitch rooflines. These homes prioritize functionality, but materials varied widely in quality as construction accelerated.
Strengths:
Straightforward floor plans that lend themselves well to open-concept remodels.
Large picture windows and integrated indoor-outdoor living spaces.
Solid framing and modest square footage; ideal for efficient upgrades.
Weaknesses:
Low ceilings and smaller kitchens are not suited to the modern lifestyle flow.
Aluminum wiring (in some late-1960s builds).
Drafty single-pane windows, minimal attic insulation, and older forced-air furnaces.
Asbestos-containing floor tiles and duct insulation (common pre-1978).
Common agent insight: These homes offer excellent remodeling bones, simple rooflines, manageable sizes, and good neighborhood lots. Highlight layout flexibility (“this wall can open easily to connect the kitchen”) and energy-efficiency upgrade potential, which are key selling points in today’s market.
Late 20th Century (1970–1995): Suburban Development Era
This period saw suburban expansion across Washington County and Clark County, think tract-built homes in Tigard, Hillsboro, and Camas. Builders relied more on standardized plans and affordable materials like particleboard subfloors, composite roofing, and T1-11 siding.
Strengths:
Better insulation and double-pane windows compared to earlier eras.
Functional layouts: family rooms, attached garages, and master suites began to appear.
Electrical systems are more modern and easier to upgrade.
Weaknesses:
Economy-grade materials prone to wear: T1-11 siding, particleboard cabinetry, and hollow-core doors.
Window and deck flashing failures leading to hidden water intrusion.
Roofs nearing the end of life (especially 20-year 3-tab shingles).
Outdated finishes: brass fixtures, oak cabinetry, carpeted bathrooms.
Common agent insight: Because layouts are relatively modern, pull-and-replace renovations can go a long way; new flooring, cabinets, lighting, and fixtures can transform these homes quickly. Agents should frame these homes as “livability upgrades waiting to happen”, move-in ready with cosmetic upside, rather than structural risk.
Modern Builds (1995–Present): Contemporary, Craftsman Revival, and Custom New Construction
Built with engineered lumber, modern insulation, and more stringent energy codes, these homes are structurally efficient and comfortable, yet still vulnerable to the Pacific Northwest’s unique climate conditions.
Strengths: Improved framing precision, vapor barriers, double-pane windows, and higher-rated insulation values (R-38+ ceilings, R-21 walls). Most feature open layouts, attached garages, and updated mechanical systems.
Weaknesses: Despite better construction standards, envelope failures remain common, especially in homes built during the early 2000s housing boom, when pace often outstripped quality. Watch for:
Failed flashing and inadequate drainage planes behind fiber-cement or stucco siding.
Poorly sealed roof penetrations and window openings.
Compressed attic insulation or missing baffles are reducing airflow.
Builder-grade materials (laminate flooring, hollow-core doors) are prone to early wear.
Common agent insight: Buyers often assume newer means “maintenance-free,” but even 10–20-year-old homes in Portland or Vancouver can show weather-related deterioration. Point out quality upgrades (new roofing systems, better ventilation, or moisture-resistant materials) as strong resale differentiators.
1.2 The PNW Climate: Beauty and Burden
Agents working in this region must account for one major variable: moisture. Rainfall in Portland averages 36–40 inches per year, while Vancouver’s climate adds freeze-thaw cycles and persistent humidity. That means water intrusion, rot, and moss growth are perennial concerns, particularly in older wood-framed homes.
Key climate impacts:
Roofing & Flashing: Shorter roof lifespans (20–25 years typical) due to constant moisture and moss.
Siding: Cedar and HardiePlank resist rot better than T1-11 or composite siding used in 70s–80s builds.
Foundations & Below-Grade Spaces: Hydrostatic pressure and poor drainage often cause basement seepage; older PNW homes frequently lack proper vapor barriers (e.g., no 6-mil poly over soil in crawlspaces, no slab vapor retarder, or torn/loose plastic). Expect elevated humidity, efflorescence, and musty odors when the barrier is missing or compromised. Recommend: perimeter drainage improvements, sump pump (as needed), continuous sealed vapor barrier in crawlspaces, and slab moisture mitigation if finishing basements.
Exterior Paint: Requires more frequent upkeep: repaint cycles average 6–8 years in the PNW.
For more details on maintaining paint and curb appeal, see How to Prepare for Exterior Home Painting.
1.3 Common Inspection Add-Ons in the PNW
Beyond standard inspections, agents in the region should familiarize themselves with add-on evaluations that are particularly important in Oregon and Washington homes:
Common Add-On Inspections in the PNW
| Add-On Inspection | Why It Matters in the PNW |
|---|---|
| Sewer Scope | Many older homes still have clay or Orangeburg sewer lines prone to collapse. |
| Oil Tank Sweep | Pre-1970s homes may have buried oil tanks that require decommissioning. |
| Radon Test | Pockets of higher radon levels are common in East Portland and Clark County. |
| Mold or Moisture Assessment | Crawlspaces and basements are frequent problem zones. |
| Structural/Foundation Evaluation | Helps clarify if visible cracks are cosmetic or structural. |
1.4 What Makes PNW Homes Distinct
Wood-Framed Construction: The vast majority of PNW homes rely on wood framing, making them flexible but vulnerable to moisture and pests.
Crawlspaces Instead of Full Basements: Expect humidity and standing water issues, particularly in east Portland and rural Clark County.
Varied Terrain: Hillsides and river-adjacent lots can present slope stability issues or drainage concerns.
Energy Efficiency Gaps: Until the 1990s, energy codes were minimal; air sealing and insulation were often poor.
Helpful Resources:
2. What to Look for During a Showing: Home Inspection Checklist in Portland, OR and Vancouver, WA
2.1 Quick Pass (5–10 minutes)
A fast visual and sensory sweep before clients get attached to finishes.
Smells:
Musty = moisture or crawlspace humidity; fuel oil = abandoned oil tank; sewer = dry trap or vent blockage.
Sightlines & Slopes:
Roof ridges should appear straight; wavy ridgelines or sloped floors can signal settlement or undersized framing.
Ceilings & Walls:
Hairline cracks (thin as paper, often from seasonal movement) are cosmetic.
Stair-step cracks through mortar or drywall joints indicate foundation movement and merit evaluation.
Windows & Doors:
Sticky operation or diagonal cracking at corners can indicate shifting frames or humidity issues. Fogged panes mean failed window seals.
Exterior Overview:
Moss-covered shingles, clogged gutters, or downspouts discharging at the foundation often point to long-term drainage neglect.
Mechanical Age:
Glance at appliance data plates. Furnaces, water heaters, or AC units older than ≈ 15 years are near the end of their life; note panel brands like Federal Pacific or Zinsco (fire risk).
2.2 Deep Dive by System (15–25 minutes)
A structured evaluation is conducted once the client is interested. Focus on what affects safety, moisture, or cost.
Site & Drainage
Look for negative grading, missing downspout extensions, or soil higher than the siding base.
Standing water after rain or mulch against the siding promotes rot.
Evidence of French drains, daylighted drain lines, or sump pumps is positive if well-maintained.
Ask about drainage maintenance schedules; PNW clay soils clog easily.
Foundation, Basement & Crawlspace
Cracks: Hairline = concrete shrinkage (low concern). Horizontal, bulging, or stair-step = lateral soil pressure; consult a structural engineer.
Moisture: Efflorescence (white mineral film), mildew odor, or dark, damp corners indicate chronic seepage.
Vapor Barrier: Missing or torn poly sheeting allows ground moisture to evaporate into framing.
Structure: Look for sistered joists or notched beams,which could signal prior rot repair or over-boring for plumbing.
Framing & Attic
Dark staining on the roof sheathing = past leaks or condensation.
Check insulation coverage; patchy or compressed batts reduce R-value.
Bath fans must vent outdoors; venting into the attic causes mold growth.
Undersized collar ties or sagging rafters in older homes show roof deflection.
Rodent trails or daylight at soffits mean air leaks and pest entry.
Roofing & Flashing
Inspect shingle condition: moss mats, curling, or missing granules reduce service life.
Soft decking at valleys or eaves = water intrusion.
Flashing should be visible and tight at chimneys and wall junctions.
Typical comp-shingle lifespan: 20–25 years in the wet PNW climate with annual cleaning and moss control.
Exterior Envelope
Check siding ends and trim for swelling or rot; T1-11 often decays at vertical seams.
Failed caulk or open butt joints allow wind-driven rain behind cladding.
Kick-out flashing where the roof meets the wall prevents gutter overflow into the siding; its absence is a major leak source.
Deck ledger flashing should be visible; hidden ledgers trap water against framing.
Windows & Doors
Pre-1978 wood windows may have lead paint; soft sills suggest chronic moisture.
1990s insulated glass units often show fogging from seal failure.
Confirm weather-strip condition and smooth operation.
Electrical
Identify knob-and-tube or cloth-insulated wiring in pre-war homes; unsafe for modern loads.
Two-prong outlets lack grounding; GFCI/AFCI is required in kitchens, baths, and bedrooms.
Fuse panels and double-tapped breakers indicate outdated or overloaded service.
Exposed junction boxes or taped splices = DIY wiring; flag for licensed review.
Plumbing
Galvanized supply lines restrict flow and shed rust flakes.
Copper with past pinhole leaks may have aggressive water chemistry; look for patches.
Cast-iron drains corrode internally. Tap with a screwdriver; dull thud = thin wall.
Verify water-heater vent clearances, seismic straps, and TPR valve discharge to code.
Check under sinks for flexible accordion traps (not code) and active leaks.
HVAC & Ventilation
Furnace older than 15–20 years or with heavy rust on burners = due for replacement.
Undersized or disconnected return ducts reduce system balance; uninsulated crawlspace ducts lose heat.
Bath and kitchen fans must vent outside; attic termination causes condensation and mold.
Window condensation on cool mornings = poor ventilation or high indoor humidity.
Interior Finishes & Floors
Floor squeaks usually stem from loose subfloor fasteners, not structural failure.
Cracked tile across joist lines signals deflection; isolated cracks near corners are often cosmetic.
Settlement gaps at trim or transitions show foundation movement or framing shrinkage.
In kitchens and baths, aged caulk or grout lets water reach subflooring, leading to hidden rot.
Health & Hazards
Lead: Likely in pre-1978 paint, trim, or windows, especially if chalking.
Asbestos: Found in vinyl-asbestos tile (VAT), mastic, pipe wrap, or some “popcorn” ceilings.
Radon: Common in East Portland basalt and Camas hills; test before basement finishing.
Underground Oil Tanks: Typical in 1940s–60s lots; look for capped fill pipes or soil staining near foundation.
2.2A Agent Field Summary Table: Red Flags & Next Steps
Common Red-Flag Systems in PNW Homes
| System | Common Red-Flag Signs | What It Might Mean | Recommended Next Step |
|---|---|---|---|
| Site & Drainage | Standing water, soil high against the siding, and a missing downspout extension | Poor drainage → rot, hydrostatic pressure | Note for inspection: recommend grading or drain evaluation |
| Foundation / Crawlspace | Stair-step or horizontal cracks, efflorescence, mildew odor, and a missing vapor barrier | Structural movement or chronic moisture | Schedule a structural engineer or foundation specialist; add moisture mitigation |
| Framing / Attic | Dark roof sheathing, visible mold, patchy insulation, vents not connected | Leaks, condensation, or poor ventilation | Request attic inspection; confirm bath fans vent outside |
| Roofing & Flashing | Moss mats, curling shingles, soft decking near valleys, and missing flashing | Roof near the end of its life or has active leaks | Recommend licensed roofer inspection; estimate remaining lifespan |
| Exterior Envelope | Rot at siding edges, soft trim, missing kick-out flashing, peeling paint | Envelope failure, trapped moisture | Suggest siding/paint contractor assessment; verify deck ledger flashing |
| Windows & Doors | Sticking, fogged IGUs, soft sills, and cracked trim paint | Frame movement or moisture intrusion | Replace failed units; check for lead if pre-1978 |
| Electrical | Two-prong outlets, mixed knob-and-tube or cloth wiring, fuse panel, exposed splices | Outdated or unsafe wiring | Licensed electrician evaluation; likely panel and circuit upgrades |
| Plumbing | Galvanized supply, corroded cast-iron drains, active leaks, rusted WH tank | Low pressure, slow drains, potential leaks | Recommend a plumber for supply replacement or a drain camera |
| HVAC & Ventilation | Furnace older than 15 yrs, rust, disconnected ducts, window condensation | Inefficient heating/cooling or poor air quality | HVAC contractor service check; verify venting and insulation |
| Interior Finishes & Floors | Uneven floors, cracked tile, gaps at trim, soft bathroom subfloor | Settlement, deflection, or moisture damage | Cosmetic if minor; investigate subfloor integrity if localized softness |
| Health & Hazards | Lead paint, asbestos materials, radon zones, and buried oil tank | Environmental hazard | Test as needed; disclose and mitigate before remodel or sale |
2.3 When to Recommend Specialist Add-Ons
Sewer scope (older lines, slow drains).
Oil tank sweep (pre-1970s).
Moisture/mold assessment (musty odors, visible growth, wet crawl).
Structural engineer (significant movement/cracking).
Roofing or envelope specialist (leaks, complex intersections).
Electrical evaluation (K&T, overheated breakers).
2.4 Buyer/Seller Conversation Starters
Buyer: “If inspection confirms moisture in the crawlspace, we’ll budget for drainage, sealed vapor barrier, and dehumidification; let’s negotiate a credit.”
Seller: “Proactive gutter/downspout extensions and a new crawlspace vapor barrier would remove major objections.”
2.5 Helpful internal links while you talk scope
Kitchens & flow: Kitchen Layouts That Work in PNW Homes, Kitchen Planning Guide (PDX)
Basements: Vancouver Basement Remodel: Costs & Timeline, Portland Basement Cost
Water & exterior: Water Damage Repair Guide,Prep for Exterior Painting
3A. Top Renovations With the Highest ROI in the PNW
These are the upgrades buyers respond to most and help to maintain a healthy home renovation ROI in Portland and Vancouver. Keep scopes disciplined, finishes durable, and projects based on improved home functionality and usable space. The data in this section is derived from a combination of local industry experience, external resources, and verified data sources, and is presented as a blend of all three. Please refer to the bottom of this section (3A.9) for a list of external resources and data sources used.
3A.1 Strategic Kitchen Refresh (High ROI, Medium Disruption)
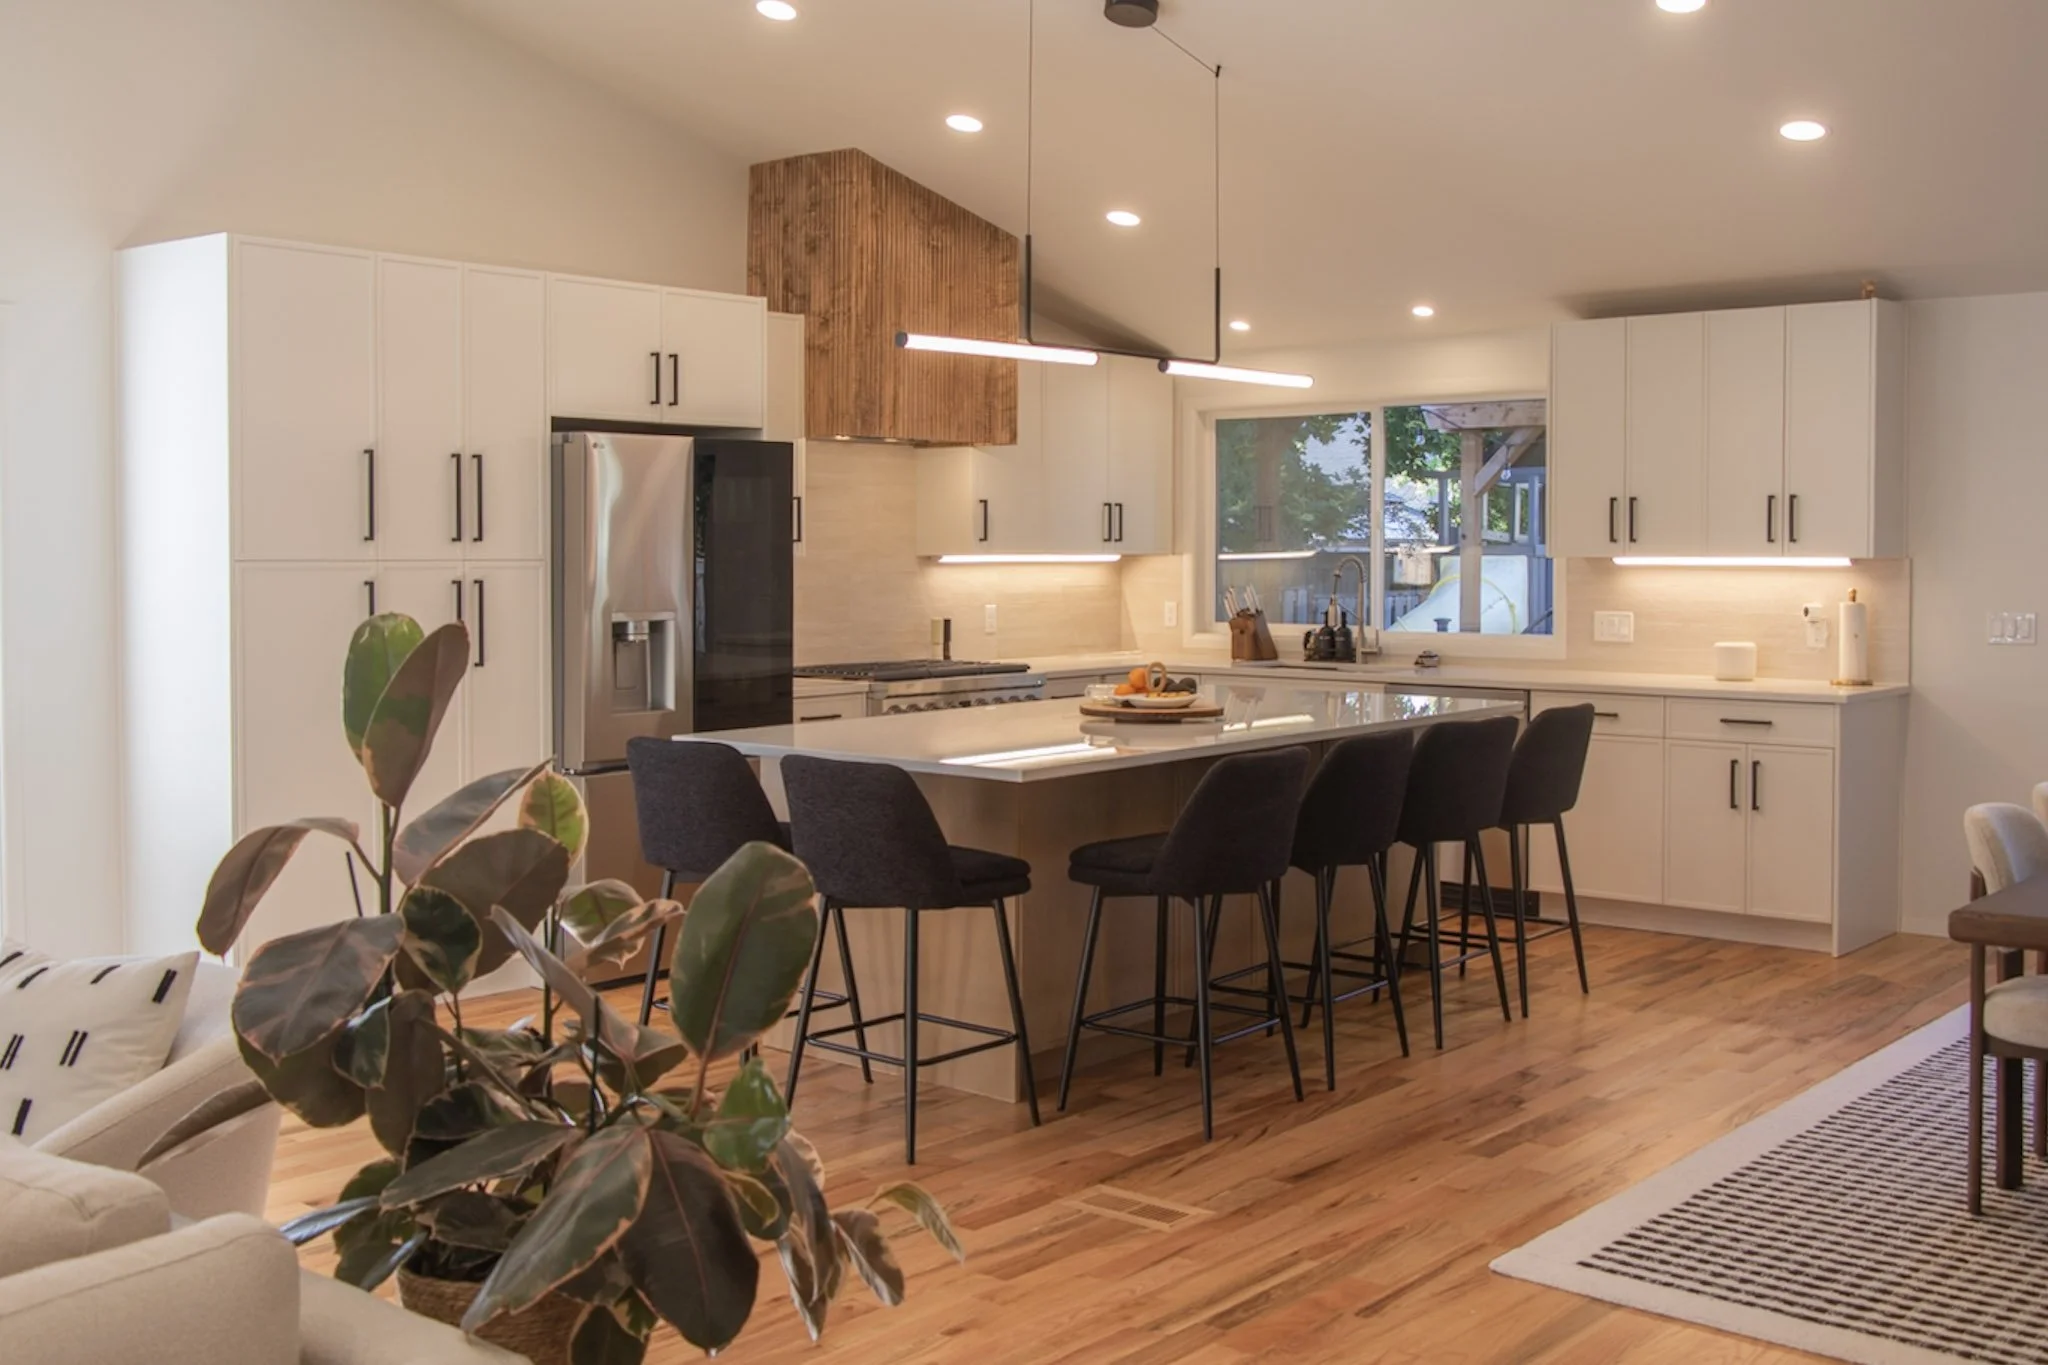
What buyers notice: Cohesive finishes, better workflow, brighter lighting, without moving walls/plumbing. If you do move walls or plumbing, focus on the kitchen work triangle and creating more open, functional space.
Typical kitchen remodel scope tiers:
Refresh: Paint/spray existing boxes, new hardware, faucet, lighting, backsplash.
Pull and Replace: New quartz tops + sink, partial cabinet replacement, LVP or refinish hardwoods.
Full Remodel: Change kitchen layout for improved workflow, possibly move walls and plumbing, consider open concept conversion, or build a kitchen island or peninsula.
Select upgrades: Undercabinet lighting, pantry pull-outs, a larger countertop overhang for island seating if space allows.
Local notes: Prioritize open sightlines in closed-off plans (selective pass-throughs or half-walls).
Permits: Usually over-the-counter for electrical/plumbing swaps; structural changes trigger a building permit.
*The typical construction timeline for a pull-and-replace remodel with Amplified Renovations is 2 weeks.
Helpful Links: Kitchen Remodel Costs in 2025-2026 | Small Kitchen Remodel Ideas
3A.2 Flooring Replacement or Refinish (high ROI, Low Disruption)
What buyers notice: Continuous, updated flooring instantly makes a home feel newer, cleaner, and more cohesive. Modern LVP or engineered hardwood adds durability and design consistency that appeals to buyers across price points.
Scope: Refinish existing hardwood floors (sand, stain, and reseal), replace worn carpet or laminate with LVP, or install engineered hardwood for moisture-prone areas. For split-level or mid-century homes common in the Portland–Vancouver area, consistent flooring through the main level dramatically improves flow and perceived square footage.
Local Notes: Because the Pacific Northwest’s humidity and subfloor movement can cause cupping or gaps, engineered hardwood or waterproof LVP is preferred over solid wood in many Portland and Clark County homes. Basements and lower levels especially benefit from waterproof materials and vapor barriers beneath planks.
Permits: Not required for standard flooring replacements or refinishing unless structural subfloor repair is included.
3A.3 Pull and Replace Bathroom Update (High ROI, Low–Medium Disruption)
What buyers notice: Clean tile, modern fixtures, better storage, improved ventilation, improved lighting.
Scope: New vanity, tops, fixtures, lighting, tile surrounds, waterproofing, and proper exhaust to the exterior.
Small bathroom remodel tips: Use built-in storage to save space, glass panels to visually expand, and larger single sink vanities (~42 inches) to expand counter space.
Local Notes: Many older Portland and Vancouver homes only have 1 bathroom, or have 1.5 baths, but are missing a primary suite bathroom. Although increased permit and design requirements typically increase the cost of adding a bathroom to the primary bedroom, this can still hold a high ROI and help your home stand out. Pull comps in the area and look for price per square foot differential between homes that have recently sold that have a primary suite, c
Permits: Trade permits only if moving plumbing; building permit if moving walls/fixtures.
Helpful Links: Portland Bathroom Remodel Costs
3A.4 Exterior Curb Appeal & Envelope Tune-Up (High ROI, Low Disruption)

What buyers notice: Fresh paint, crisp trim, healthy roof/gutters, tidy landscaping.
Scope: Exterior repaint (prep matters in our climate), front-door upgrade, lighting, house numbers, minor siding repair, downspout extensions, moss removal, and roof maintenance.
Local Notes: Constant moisture + UV = faster coating degradation; clean gutters, kick-out flashing, and moss removal prevent silent rot and protect the buyer’s investment. Moreover, an upgraded exterior instills confidence in buyers that the house has been well-maintained and provides a positive showing experience from the moment they pull up to the house.
Helpful links: Exterior Painting Cost in Portland | How to Prepare for Exterior Painting
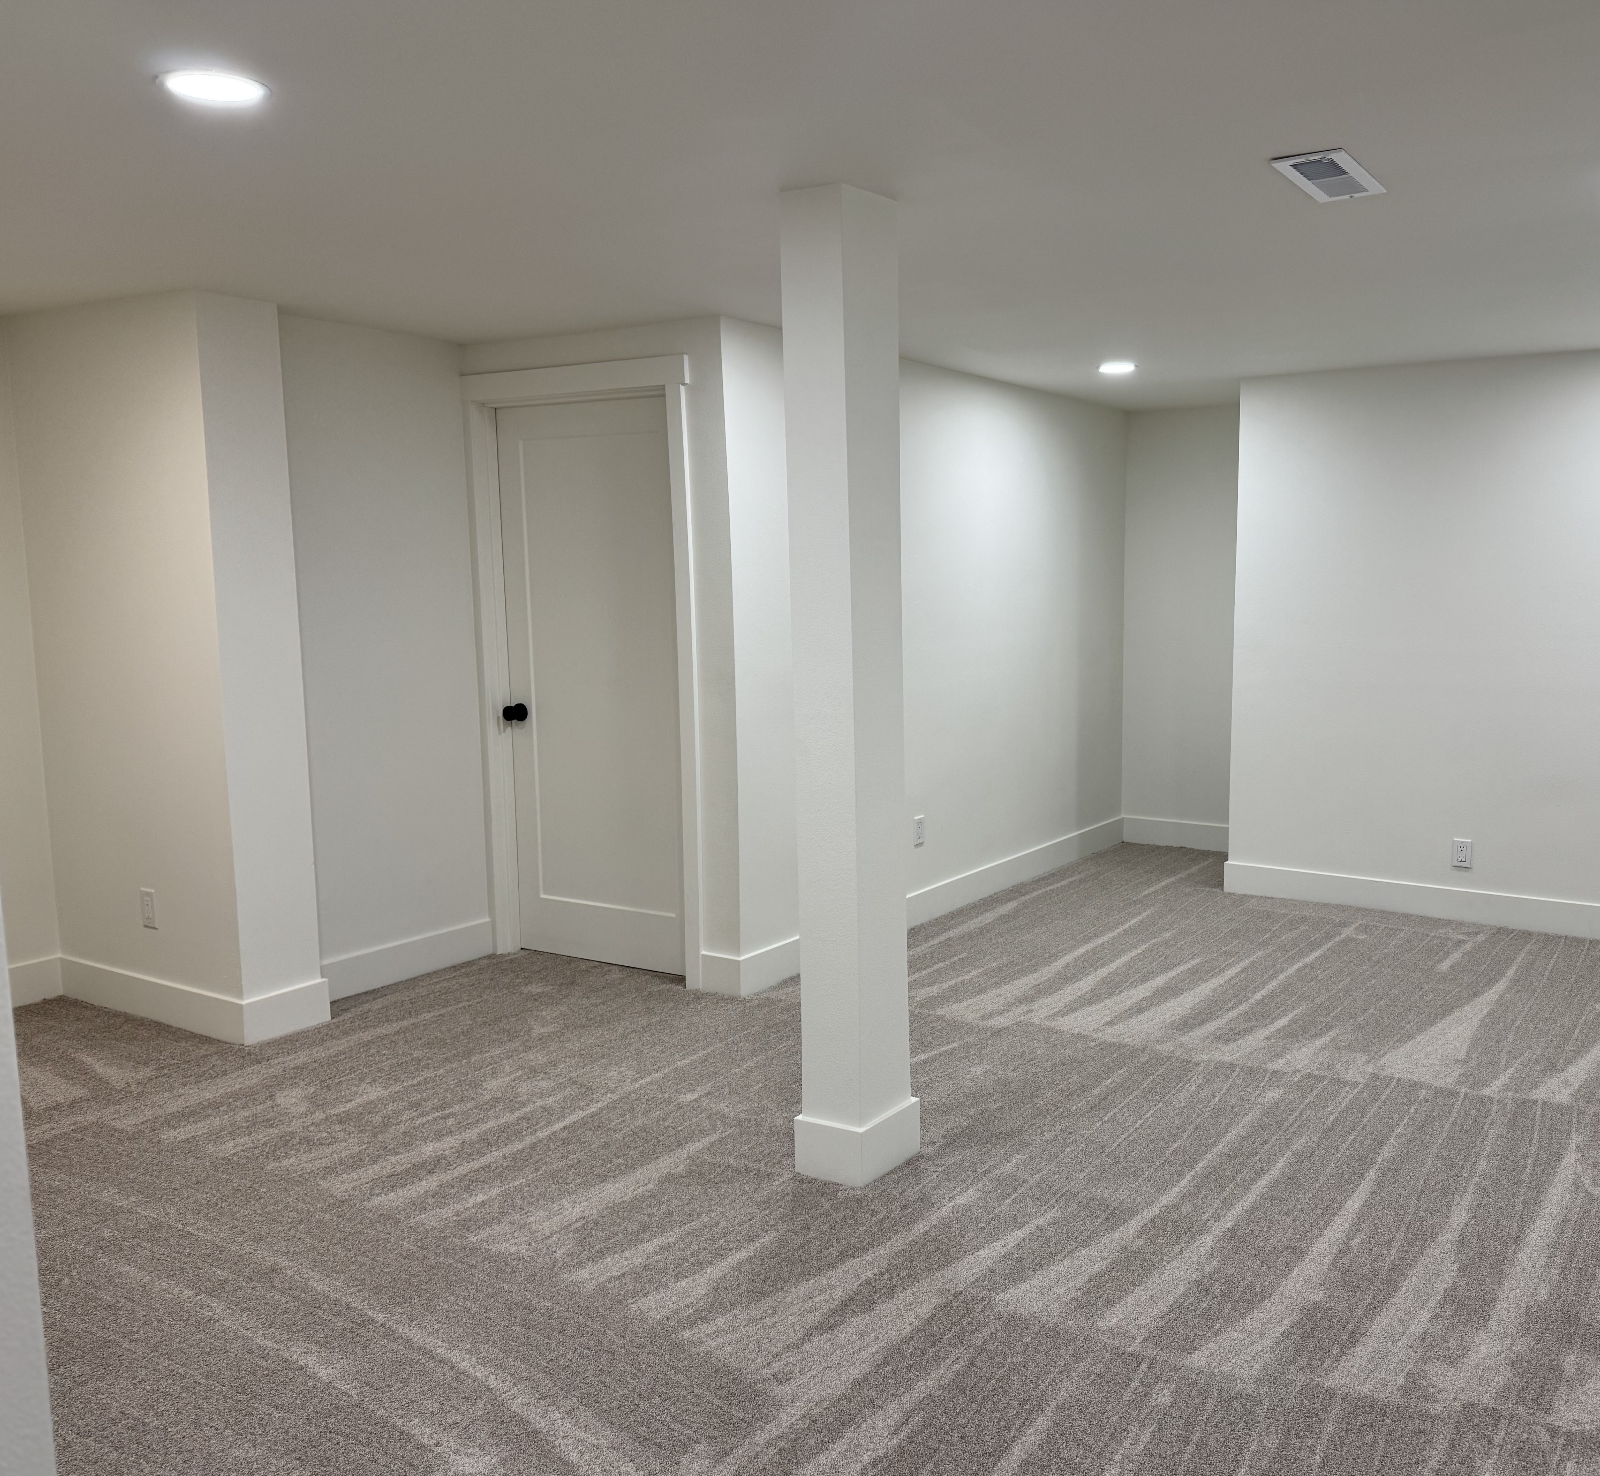
3A.5 Basement & Attic Conversions (ROI Varies, High ROI When Done Right)
What buyers notice: Usable SF for office/guest/flex space; dry, warm, code-compliant egress, added bedrooms and bathrooms improve price per square foot.
Scope: Moisture management (drainage, vapor barrier), insulation, egress window/dormer, new stairs (if local code is not met with current stairs), framing + drywall + paint, potential bathroom rough-ins and finishes, reinforcing the subfloor prior to new floor installation (in attics), and new windows.
Permits: Building + multiple trades; egress and ceiling height are key.
Local Basement & Attic Conversion Notes:
For basement conversions- Check Portland Maps to see if the square footage of the basement is already included in the total home square footage. If not, there is immense value and lower cost in simply finishing the basement with a vapor barrier, framing + drywall, recessed lighting, new electrical, and new flooring. Be sure to check and address the slope of the yard and exterior home drainage, as heavy rains can cause water to seep into basements.
If not, adding a bedroom is a great way to lock in ROI on a basement conversion. Egress windows typically cost $5k-$15k. Common variables that increase egress window costs are a deep basement, no existing window (even if it’s not to code, it’s much easier to create an egress window from a pre-existing window), or having to move drains.
For attic conversions: Consider adding skylights to bring more natural light into the space. Dormers are a great way to add more usable square footage. Engineering and permits can get expensive here, but there is still ROI to be had with a well-thought-out remodel. Consider layout, flow, and adding bedrooms/bathrooms to increase the price per square foot value.
Helpful links: Vancouver Basement: Costs & Timeline | Portland Basement Costs | Basement Remodel Ideas
3A.6 Roof, Drainage & Water Management (High ROI, High Risk Reduction)
What buyers notice: A dry house and a recent roof disclosure.
Scope: Re-roof as needed, correct flashing, add kick-outs, clean/repair gutters, extend downspouts, regrade away from foundation, and add/repair drains.
PNW bonus: Kill moss, keep debris off roof/valleys, maintain 6–8 yr paint cycles to protect trim/siding.
Helpful links: Water Damage Repair Guide
3A.7 Energy & Comfort Upgrades (Medium ROI, High Buyer Appeal)
What buyers notice: Smaller utility bills, less condensation/draft, quieter rooms.
Scope: Air sealing, attic + crawlspace insulation, bath/kitchen vents to exterior, duct sealing, window upgrades where payback is reasonable; ductless mini-split for zoned comfort.
Local Notes: Portland summers have been getting warmer, and many buyers are looking for well-insulated homes and homes that have air conditioning. When buyers see a house that already checks these boxes, it helps make the house more enticing. On that same note, these upgrades often come with relatively high costs and a predictable but limited value add- this project is also easily scoped for buyers to plan in the future. If your remodel budget is tight, you might want to consider other projects before selling.
3A.8 Smart, Scope-Capped Additions or ADUS (Selective ROI, High Impact)
What buyers notice: Added square footage that feels seamless; a true primary suite, expanded kitchen, or guest ADU that integrates naturally with the home’s flow and elevates function without appearing “bolted on.” Successful additions balance cost, zoning limits, and livability improvements while maintaining the home’s existing envelope character.
Scope tiers:
Micro Additions: Small bump-outs (under 200 sq ft) to expand a kitchen, create a walk-in closet, or add a compact primary bath.
Full Additions: Primary suite wings, great room expansions, or finished second-story over existing garage or footprint.
Accessory Dwelling Units (ADUs): Detached or attached secondary units designed for rental income, multigenerational living, or resale differentiation.
Scope considerations:
Tie into existing rooflines and foundations cleanly to avoid uneven transitions.
Plan for structural tie-ins and utilities early; HVAC, plumbing, and electrical extensions often drive hidden costs.
Maintain a consistent exterior palette (siding, trim, window proportions) for visual continuity and appraisal alignment.
Consider resale optics: smaller, highly functional additions generally perform better than large, over-customized expansions.
Permits: Full building and multiple trade permits are required. Expect zoning review for setbacks, height, and lot coverage (FAR). Historic overlay zones or floodplain proximity can add complexity; always verify through the Portland Bureau of Development Services or the City of Vancouver’s online permit center before design.
Local notes:
In Portland, most neighborhoods allow ADUs or small additions within existing lot coverage if the structure remains below 24 ft and matches the main-house design language.
In Vancouver and Clark County, detached ADUs often have simpler review paths and shorter approval timelines.
Energy and stormwater management standards can add cost (especially on sloped lots).
When it pencils:
Lot coverage allows expansion without variance.
Local comps show strong price-per-square-foot premium for finished suites or ADUs.
Design solves functional bottlenecks (no primary suite, cramped kitchen, poor indoor-outdoor access).
Clients plan to own for 5+ years or use the added space for multigenerational living or supplemental income.
Helpful links: Home Addition Guide Vancouver | Home Addition Guide Portland | A Guide to Building an ADU in Portland | Garage Conversion vs. Building a New ADU
3A.9 external resources and data sources
3B. Common Home Issues in the Pacific Northwest: Problem Areas & Recommended Improvements
Older homes across Portland, Vancouver, and Clark County share an unmistakable charm, but also a recurring list of livability and comfort challenges. These aren’t always “deal breakers,” but they are the details agents should help buyers and sellers recognize early.
Each subsection below covers:
Context & Causes
Visual or Functional Signs
Typical Solutions & Costs
Permit notes (when needed)
3B.1 Closed-Off or Compartmentalized Layouts
Context & Causes: Most 1900s–1970s homes were built when formal dining rooms and separate kitchens were fashionable. Today’s buyers expect light, flow, and connection.
Signs:
Narrow doorways between the kitchen/living areas
Load-bearing walls dividing main living spaces
Isolated dining rooms with little natural light
Solutions:
Remove non-structural walls, or add a flush LVL beam for an open concept.
Reconfigure cabinetry to face living areas; install peninsula or island seating.
Upgrade flooring and lighting for visual continuity.
Approximate Cost: $15k–$25k for full open-concept wall removal + finishes. This includes engineering and permits.
Permit Note: Structural beams require engineers to provide updated building plans and a structural permit.
3B.2 Lack of a True Primary Suite
Context & Causes: Most pre-1970 homes have one hall bath shared by everyone.
Solutions:
Convert two small bedrooms into one suite.
Add a compact ¾ bath within the existing footprint or a dormer addition.
Use space-saving fixtures and pocket doors to convert the existing layout
Approximate Cost: $35k–$75k, depending on plumbing runs and layout.
Permit Note: Adding or reconfiguring bathrooms almost always triggers trade permits and sometimes a building permit, depending on scope.
Portland, OR:
Trade permits (plumbing + electrical) are required for any new fixtures or circuit work.
A building permit is ONLY required if adding or moving walls, altering structural framing, or modifying windows for egress.
Mechanical permit if venting new exhaust fans through the roof or siding.
Bathroom additions within the existing footprint typically qualify for standard residential plan review.
If the home is in a Historic or Conservation Zone, design review may apply for exterior window/dormer changes.
Vancouver / Clark County, WA:
Trade permits are required for all new plumbing, electrical, and mechanical systems.
Building permit needed only if altering framing or adding a new exterior opening (window/dormer).
Interior conversions with no structural changes can often be permitted through the city’s Quick Permit process.
Detached or dormer additions must meet the current energy code (WA State Energy Code).
3B.3 Outdated Kitchens & Cabinetry
Context & Causes: Many Portland and Vancouver homes from the 1960s–1990s feature builder-grade cabinets, laminate counters, and inefficient layouts. Years of humidity and wear often lead to peeling finishes, failing hardware, and dark, dated spaces.
Signs:
Peeling thermofoil or veneer cabinetry.
Outdated appliances and inefficient workflow.
Poor lighting, minimal counter space, or worn flooring.
Solutions:
Refinish or repaint existing cabinets, add new hardware, and update countertops with quartz or butcher block.
Install LED under-cabinet lighting and upgrade flooring to LVP or hardwood.
Approximate Cost: $25K–$50K for light to moderate updates that do not require permits; $60K+ for full remodels (moving walls & plumbing, or high-luxury pull-and-replace).
Permit Note: Plumbing or electrical fixture changes require trade permits; layout or wall modifications require a building permit.
3B.4 Old Flooring & Squeaky Subfloors
Context & Causes: Older PNW homes often have shiplap or 1× subfloors over sawn joists. Over time, nails loosen, causing squeaks or soft spots, especially with moisture fluctuations.
Signs:
Creaks or bounces in floors when walking.
Soft or uneven spots under carpet or vinyl.
Visible gaps or sagging along floor transitions.
Solutions:
Reinforce with screws and adhesive through underlayment or re-nail from below.
Consider a new underlayment with LVP or engineered hardwood for added rigidity.
Approximate Cost:
Reinforcement only (squeaks, minor soft spots, existing floor essentially sound)”: ~$8–15/sq ft
Sub-floor replacement + new finish flooring (moderate finish, e.g., mid-tier LVP or engineered hardwood): ~$15–30/sq ft
Sub-floor replacement + premium finish flooring + structural/joist remediation: ~$25–40+/sq ft
Permit Note: Repairs do not require a permit, but subfloor replacement tied to structural framing may need a building permit if joists are modified.
3B.5 Tiny Bathrooms & Poor Storage
Context & Causes: Small bathrooms (often 5×7) are common in pre-war and mid-century homes. Poor lighting, minimal storage, and outdated fixtures make them feel even smaller.
Visual or Functional Signs:
Pedestal sinks, narrow vanities, or no counter space.
Low lighting, mildew, or failing ventilation.
Linen storage outside the bathroom.
Typical Solutions & Costs:
Convert the tub to a glass shower, add a floating vanity, and build recessed niches or shelving.
Upgrade to moisture-rated lighting and proper venting.
Approximate Cost: $20K–$45K, depending on finish quality and fixture relocation.
Permit Note: Relocating fixtures requires plumbing/electrical permits; wall or window changes trigger a building permit.
3B.6 Exterior Moisture & Moss
Context & Causes: Constant rain and shaded lots make PNW exteriors prone to moss, algae, and moisture damage, especially when gutters or drainage are neglected.
Signs:
Moss on the roof or siding, soft trim, or paint failure.
Overflowing gutters or downspouts are draining at the foundation.
Persistent dampness around the crawlspace or siding.
Solutions:
Soft-wash moss removal, extend downspouts 8–10 ft., repaint every 6–8 years.
Trim vegetation two ft. off the siding, and repair flashing as needed.
Approximate Cost: $6k–$15k+ for full repaint and repair.
Permit Note: Maintenance work requires no permits; structural or siding repairs tied to framing need a building permit.
3B.7 Outdated Electrical & Lighting Layout
Context & Causes: Many pre-1950 homes still have knob-and-tube wiring or undersized 60–100A panels. Lighting layouts were designed for lamps, not today’s recessed or layered systems.
Signs:
Two-prong outlets or frequently tripped breakers.
Fuse boxes, mixed cloth wiring, or dim, uneven lighting.
Limited outlets in kitchens and baths.
Solutions:
Upgrade to a 200A panel, replace outdated wiring, and add modern LED lighting layers.
Install GFCI/AFCI protection in wet or sleeping areas.
Approximate Cost: $6k–$10k for partial updates; $10k–$20k+ for full rewire.
Permit Note: Electrical rewiring and panel upgrades require electrical trade permits and inspection; exposed framing work also triggers a building permit.
4. Timeline Expectations & Project Phases
Project planning and execution should be high when working with a licensed general contractor. A home renovation timeline in Portland or Vancouver ought to be provided. At Amplified Renovations, all projects are scheduled so materials are ordered, received, and staged before construction begins.
Pre-fab or semi-custom selections can usually be staged in 2–4 weeks; fully custom items may add lead time. That said, we can start projects quickly when needed. Moreover, we focus on overcommunication and are flexible with our timelines.
We strive to reduce the construction stress on homeowners. To do so, we deploy a hyper-vigilant project planning and sub-contractor management system that keeps work efficient and on schedule.
4.1 Amplified’s Typical Construction Timelines by Project Type (not including permits)
Average Remodel Timelines
| Project Type | Average Construction Duration | Key Notes |
|---|---|---|
| Kitchen Remodel | ~2–3 weeks | Matches Amplified’s process; see phase breakdown below. |
| Bathroom Remodel | ~2–3 weeks | Tile curing and fixture relocation drive variance. |
| Basement Finish / Conversion | 3–5 weeks | Includes waterproofing, insulation, egress, framing, and finishes. |
| Home Additions | ~4–10 weeks | Foundation, roof tie-ins, and inspections extend duration. |
| Whole-Home Remodel | ~4–8 weeks | Staged by level/zone for livability. |
| Interior / Exterior Painting | ~3–7 days | Prep, color count, and weather dependent. |
Agent talking point: “Once materials are staged, a standard kitchen runs about two weeks start to finish.”
A Typical Kitchen Remodel Phase Breakdown (Amplified’s process)
Kitchen Remodel Phase Breakdown
| Phase | Duration |
|---|---|
| Demolition | 1–2 days |
| Rough-in & Inspection | 2–3 days |
| Cabinet Install | 1–2 days |
| Countertop Measure, Fabrication, and Installation | 3–5 days |
| Tile Backsplash (if needed) | 1–2 days |
| Flooring & Finish Work | 2–3 days |
| Final Inspection & Cleanup | 1–2 days |
| Total | 13–19 days |
4.2 Average Permit Timelines (separate from construction)
Permit Review Timelines
| Jurisdiction / Review | Typical Turnaround | Notes |
|---|---|---|
| Trade Permits (Plumbing, Electrical, Mechanical) | ~1–4 weeks | Often over-the-counter or quick review. |
| Portland, OR – Building Permits | ~3–8 weeks (simple) • 6–14+ weeks (structural/additions) | Longer with design overlays or complex scopes. |
| Vancouver / Clark County, WA – Building Permits | ~3–7 weeks (simple) • 5–14+ weeks (structural/additions) | Quick Permit path available for non-structural interior work. |
| Egress Window / Dormer | ~2–6+ weeks | Requires building review and engineering details. |
4.3 Standard Project Phases (Amplified)
Design Consultation & Scope Definition: ~1–4+ weeks (depending on how much work/thought the homeowner has put into the project)
Material Lead Times: 2-8 weeks (usually, how far we will schedule you out after a scope is agreed on)
Permitting (as needed): ~2–10+ weeks, jurisdiction-dependent (we will order any materials we can during this time to reduce the wait until start time)
Construction: per table above (e.g., kitchen ~2 weeks)
Final Inspections & Close-Out: ~1 week
5. Cost Benchmarks & Local Pricing Realities
Understanding pricing helps agents frame client expectations, especially when comparing homes that need work versus move-in ready listings.
Amplified Renovations’ cost ranges are based on real 2024–2025 projects in Portland, Vancouver, Camas, and Clark County, incorporating both material and labor averages for licensed, permitted work.
5.1 Average Project Cost Ranges
Average Remodel Cost Ranges
| Project Type | Typical Range |
|---|---|
| Kitchen Remodel |
Minor Remodel: $10,000 – $25,000 Mid-Range Remodel: $25,000 – $50,000 High-End Remodel: $50,000 – $100,000+ |
| Bathroom Remodel |
Cosmetic Bathroom Remodel: $8,000 – $18,000 Pull and Replace Bathroom Remodel: $18,000 – $35,000 Custom Bathroom Remodel: $35,000 – $70,000+ Luxury Bathroom Remodel: $70,000 – $100,000+ |
| Basement Remodel | $40,000 – $100,000+ |
| Whole Home Remodel | $65 – $95 per sq. ft. |
| Garage ADU Conversion | $100,000 – $200,000+ or ~ $150–$250 per sq. ft. |
| New Build ADU | $200,000 – $350,000+ or ~ $250–$400 per sq. ft. |
| Home Addition |
Basic bump-out or single-room addition: $60,000 – $120,000 Master suite or large multi-room addition: $100,000 – $250,000 Second story additions: $150,000 – $400,000 |
| Exterior Painting | $6,000 – $15,000+ |
| Interior Painting | $15,000 – $30,000 (Full repaint of 2,000 sq. ft. home with two products typically $20,000+) |
5.2 Cost Drivers Emphasized by Amplified Renovations
Cabinetry and Custom Millwork – The largest single expense in most kitchens; design and lead time can shift both budget and schedule.
Layout or Structural Changes – Removing load-bearing walls or altering plumbing stacks adds engineering and inspection costs.
Moisture & Waterproofing – Essential in basements, crawlspaces, and bathrooms. Amplified prioritizes drainage and vapor barrier installation before finishes.
Permitting & Engineering – Structural reviews, engineering plans, and inspections can add $3K–$10K+ to project costs depending on scope and jurisdiction.
Design Change Orders – Mid-project design changes can increase total costs by 5–15%. Amplified minimizes this through detailed planning and preconstruction review.
Finish Level – High-end materials (tile, slab, fixtures) can double the total cost compared to midrange selections.
Home Age / Condition – Older homes may require updates to electrical, plumbing, and insulation systems to meet code.
5.3 Additional Context: Macro-Economic Factors
Localized Construction Cost Factors (2025)
| Factor | Localized Impact |
|---|---|
| Labor Rates (2025) | Skilled-trade labor costs in Portland/Vancouver are rising: documented increases of approximately 4–5% have been reported, and local contractors cite tighter labor markets and wage pressures. Source |
| Material Volatility | Imported tile, custom cabinetry, and quartz pricing fluctuate seasonally. Tariffs on cabinets and derivative materials may add 10–18%+ to specific SKUs. Source |
| Inspection Backlogs | Permitting and inspection delays are confirmed in local jurisdictions—e.g., the City of Portland increased permit-service fees in July 2025 due to labor and material cost pressures. Source |
| Tariffs & Trade Policy | New tariffs on imported timber and cabinets are expected to raise material costs. A recent industry analysis estimates a 9% increase in total construction material costs due to 2025 trade measures. Source |
5.4 Key Resources for This Section
Want to dive deeper into home renovation costs in Portland and Vancouver, WA area? Here are some emodeling cost resources:
6. Warning Signs/Red Flags to Watch For: Home Repair Red Flags Inspection List
6.1 Foundation & Structural Red Flags
Structural issues are most common in older East Portland bungalows, mid-century Vancouver ranches, and homes with basements or crawl spaces.
What to look for:
Step-cracks in the stem walls or chimney separation.
Sloping or bouncy floors over crawlspaces.
Efflorescence or moisture staining on foundation walls.
Missing vapor barrier or damp soil in crawlspaces.
Agent notes:
Minor hairline cracking and isolated moisture can often be mitigated with drainage and encapsulation.
Severe displacement or sagging requires a structural engineer's consultation before closing.
Do you have questions about a foundation or structure red flag? We are happy to provide a second opinion or a structural engineer referral. Please reach out to us at (360) 450-5547.
6.2 Moisture and Water Intrusion
Portland & Vancouver average more than 35 inches of rain yearly. Prolonged humidity without ventilation leads to rot, mold, and structural damage.
What to look for:
Musty odor or visible mold on sill plates.
Rusted HVAC ducts in crawlspaces.
Gutters are terminating too close to the foundation.
Moss buildup on roofs and shaded siding.
Agent notes:
Possible solutions are:
Extend downspouts 8–10 ft, add French drains, and install a sump pump where needed.
Seal crawlspace with a 6-mil vapor barrier and mechanical ventilation.
Ensure bath fans vent outside, not into the attic.
6.3 Outdated Electrical or Plumbing
Older PNW homes frequently retain original wiring and galvanized plumbing, both of which can limit insurance coverage and increase safety risks.
What to look for:
Two-prong or mixed knob-and-tube outlets.
Cloth-wrapped wiring is visible in the attic or crawlspace.
Galvanized supply lines, drum traps, or corroded fittings.
Agent notes:
Full electrical updates typically $14k–$30k+ in vintage homes, including drywall repairs
For an typical Portland or Vancouver home (2,200 square feet or less) a galvanized to PEX conversions usually $8k–$20k.
Mention that modern wiring supports today’s appliance loads and improves insurability.
6.4 Roof and Exterior Envelope
Roofing and exterior components bear the brunt of the PNW’s rainfall and moss growth; minor neglect can quickly become costly water damage.
What to look for:
Curling or brittle shingles (>20 yrs).
Missing kick-out flashing is causing siding rot.
Peeling paint or soft trim at eaves.
Vegetation touching the siding or the roofline.
Agent notes:
Exterior paint cycles average 6–10 years locally.
Encourage annual roof/gutter cleaning and moss treatment to extend life.
6.5 Interior Finishes & Flooring
Interior finishes reveal how well a home has been maintained; squeaks or cracks usually signal wear, not major structure failure.
What to look for:
Creaking floors → loose subfloor fasteners.
Cracked grout or tile → subfloor movement.
Peeling trim paint → moisture or vapor pressure.
Agent notes: Recommend budgeting $10k–$25k+ for subfloor repair and new LVP or engineered flooring during cosmetic remodels.
6.6 Environmental and Health Concerns
Many older Portland and Vancouver homes contain legacy materials that now require mitigation before remodel permits are issued.
What to look for:
Lead paint in pre-1978 homes (trim, windows, siding).
Asbestos in floor tiles, mastic, or duct insulation.
Radon pockets in east Portland & Camas basements.
Underground oil tanks on pre-1970 lots.
Agent Note: Amplified Renovations and other reputable home remodeling contractors coordinate third-party testing and remediation before construction. These steps protect client liability and prevent permit delays.
7. Local Permitting & Code Considerations
Permitting is where Oregon and Washington begin to diverge sharply. Whether you need a Portland or Vancouver building permit guide, agents who can clarify these differences early make transactions smoother and minimize surprises during feasibility or appraisal.
7.1 Portland, Oregon Permitting Essentials
Primary Authority: Portland Bureau of Development Services (BDS)
Typical Trigger Thresholds
Converting an attic, basement, or garage into living space requires a building permit.
Adding or enlarging any structure over 200 sq ft or with a height over 15 ft from the grade plane.
Moving, removing, or adding walls, or changing door/window openings.
Constructing a deck or stairway more than 30 inches above the adjacent grade.
Installing, altering, or relocating plumbing, electrical, mechanical systems, or HVAC.
Permit Durations
Trade-only (elec/plumb/mech): ~1 week.
Full building permits (e.g., kitchen w/ structural change): ~4–12 weeks.
Home Additions and ADUs: 8–16 weeks
Unique Portland Factors
Projects in Historic or Conservation Overlay Zones may require Design Review in addition to building permits.
System Development Charges (SDCs) may apply for new units or major additions; some exemptions may apply for permits issued Aug 2025–Sep 2028.
Energy efficiency standards apply: for instance, upgrades may trigger current insulation or envelope requirements even for remodels.
Even maintenance-type work may require permits depending on scope (e.g., window enlargement, structural changes).
Portland Permitting Blog Resources:
7.2 Vancouver / Clark County, WA Permitting Essentials
Primary Authority: City of Vancouver Community Development Dept & Clark County Building Safety
Typical Trigger Thresholds
A building permit is generally required for additions, alterations, or remodels to existing homes.
New construction of a single- or two-family dwelling, or accessory dwelling unit.
Adding or removing walls, decks, patios over 18” above grade, or changing the building footprint.
Electrical, plumbing, or mechanical work done as part of an alteration or remodeling requires trade permits (often bundled with a building permit) if part of the remodel.
Timeline & Process
Trade-only (elec/plumb/mech): ~1 week.
Full building permits (e.g., kitchen w/ structural change): ~4–12 weeks.
Home Additions and ADUs: 8–16 weeks
Unique Vancouver/Clark County Factors
Residential building permits are submitted via the ePlans portal; digital plan review is standard.
The City of Vancouver (and Clark County) uses the 2021 Washington State Energy Code; remodeling work may trigger energy compliance if new heating/cooling or insulation systems are added.
Permit fees are calculated based on valuation (labor + materials) and square footage of new construction or additions.
Some smaller accessory structures or deck projects may be permit-exempt under strict size and height limits (e.g., decks < 18” above grade).
Helpful Links:
7.3 ADUs and Accessory Projects
Portland Highlights
Allowed in most residential (R) zones; attached or detached.
Maximum size: 800 sq ft or 75% of the main house, whichever is smaller.
May be created via garage conversion or new construction.
Must match the roof pitch, siding materials, and window proportions of the main house.
Subject to zoning setbacks and design review in overlay districts.
Permit timeline: ~8–16 weeks, typically.
Vancouver / Clark County Highlights
Permitted in most residential zones; attached or detached ADUs allowed.
Maximum size typically up to 1,000 sq ft or 50% of the primary dwelling area.
No owner-occupancy requirement (currently waived citywide).
Up to two ADUs may be approved per lot, subject to zoning and setback requirements.
Fewer architectural restrictions than in Portland.
Permit timeline: ~4–8 weeks, depending on the scope and the completeness of the plan.
7.4 Unpermitted Work & Transaction Risk
Agents should be alert to unpermitted work during listing preparation or buyer diligence. While a sale can proceed, unpermitted work may:
Impact financing if lenders or appraisers identify non-permitted additions or modifications.
Lead to insurance coverage issues, including denial if undisclosed work causes damage.
Trigger seller disclosure obligations and negotiation adjustments even if retroactive permitting is not pursued.
Require retroactive permitting or abatement, which may delay closing or add cost.
Affect resale value or buyer perception of risk, especially when sale comparables assume permitted status.
At the end of the day, unpermitted work needs to be viewed and digested as another data point for the buyer. It is not a deal killer, but it ought to be accounted for in the deal.
8. Case Studies: Real Homes, Real Transformations
Every home tells a story. These Amplified Renovations projects illustrate how thoughtful design and construction can turn dated PNW homes into functional, high-value spaces, and how real estate agents can use these examples to show clients what’s possible.
8.1 Beaverton Vaulted Ceilings & Open Concept Kitchen

Before: This Beaverton ranch had the quintessential 1970s floor plan; low ceilings, closed-off rooms, and minimal natural light.
Challenges:
Compartmentalized layout with non-structural walls limiting sightlines.
Dark, dated cabinetry and limited countertop space.
No central gathering zone.
Unvaulted ceiling, which required total roof demolition to vault
Solution: We rebuilt the ceiling and raised the ceiling height to a vaulted design, as well as reconfigured the main floor layout to connect the kitchen, dining, and living zones. Custom cabinetry and quartz counters provided both warmth and flow.
Outcome: A brighter, vaulted space that feels nearly twice as large and brand new. Kitchen, living, and dining spaces all flow seamlessly.
Agent Takeaway: When showing similar mid-century ranches, emphasize potential for vaulted conversions or open-wall concepts.
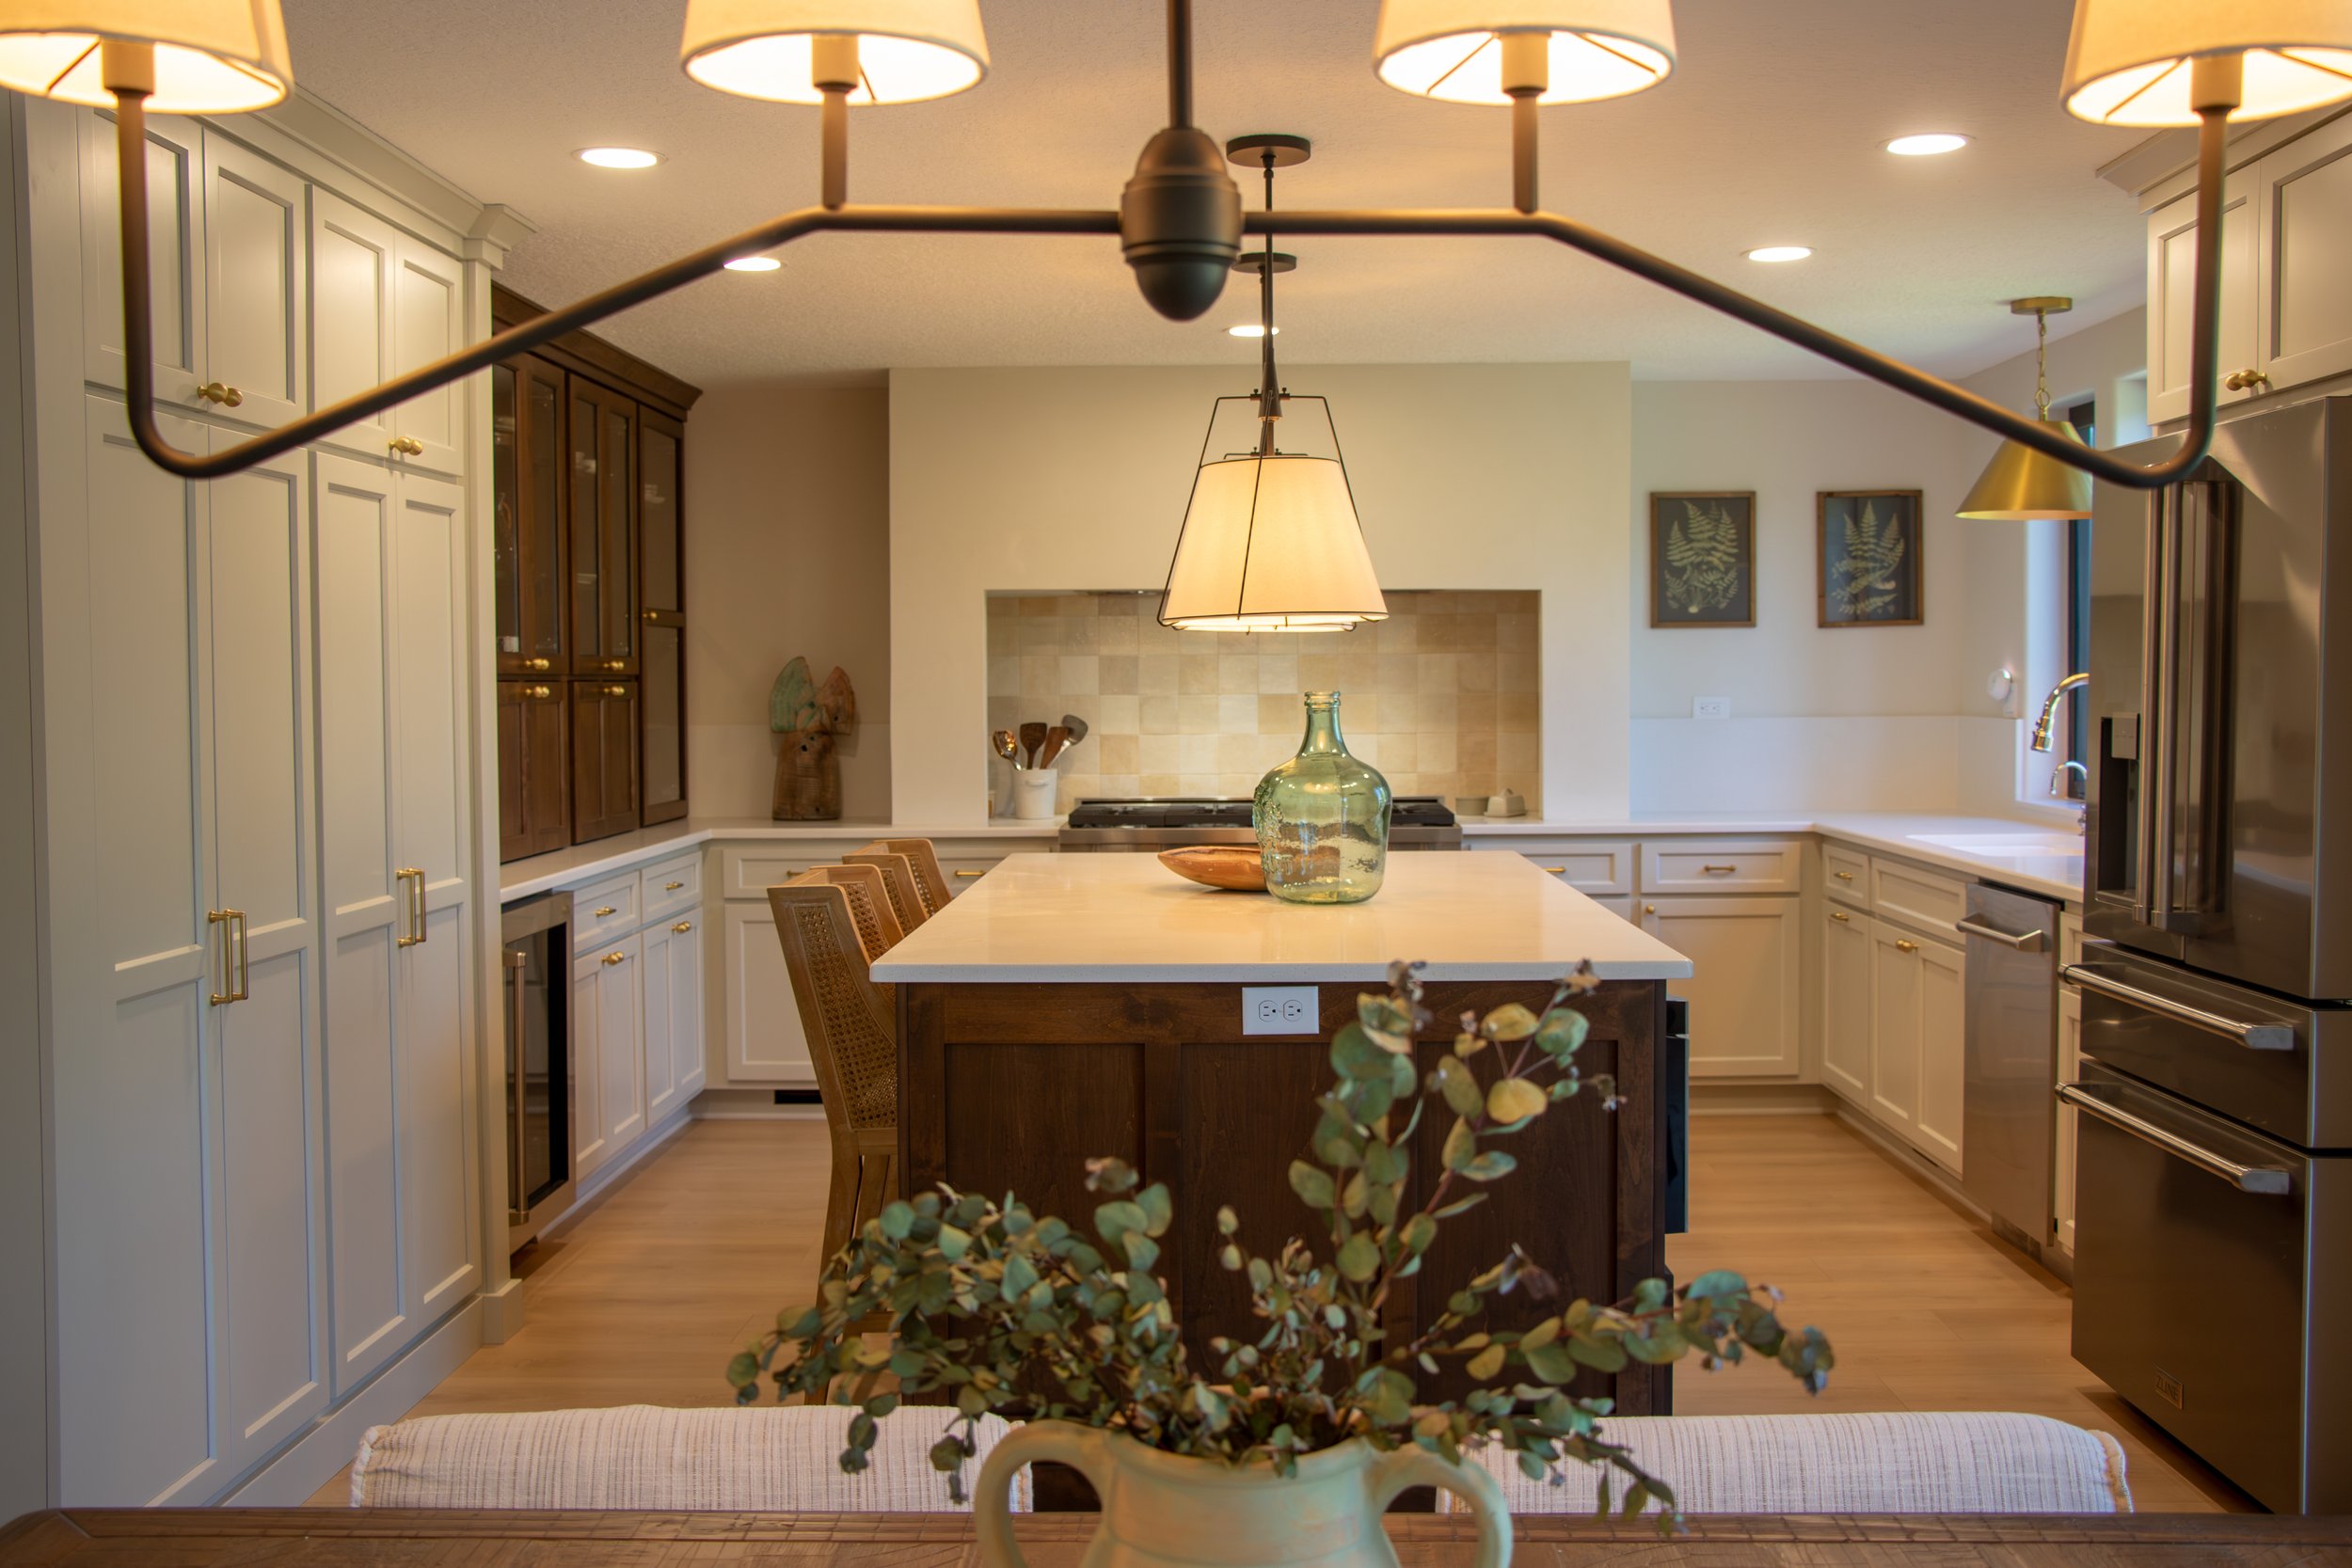
8.2 Mountain Park Remodel (Lake Oswego)

Before: A classic older Lske Oswego home with narrow hallways, dated tile floors, and limited light penetration. Unlimited potential, but it needed a thoughtful remodel to bring it into the modern age.
Challenges:
Mid-century construction with several load-bearing walls that helped form hallways and rooms.
Outdated kitchen materials and confined layout.
The kitchen and bathrooms lacked storage and efficient fixtures.
A sunken and compartmentalized living room
Solution: We strategically opened walls while maintaining structural integrity, expanded the kitchen footprint, and upgraded finishes with natural wood tones and soft whites to modernize the mid-century aesthetic. We left plenty of space on the elevated (kitchen and former hallway) part of the floor for a seamless transition to the sunken living room.
Outcome: Improved light flow, increased usable space, and energy-efficient systems ready for the next 30 years.
Agent Takeaway: When walking through split-level or daylight-basement homes, highlight ceiling height, stairwell light, and layout adaptability.
8.3 Hembree Project (Tigard)
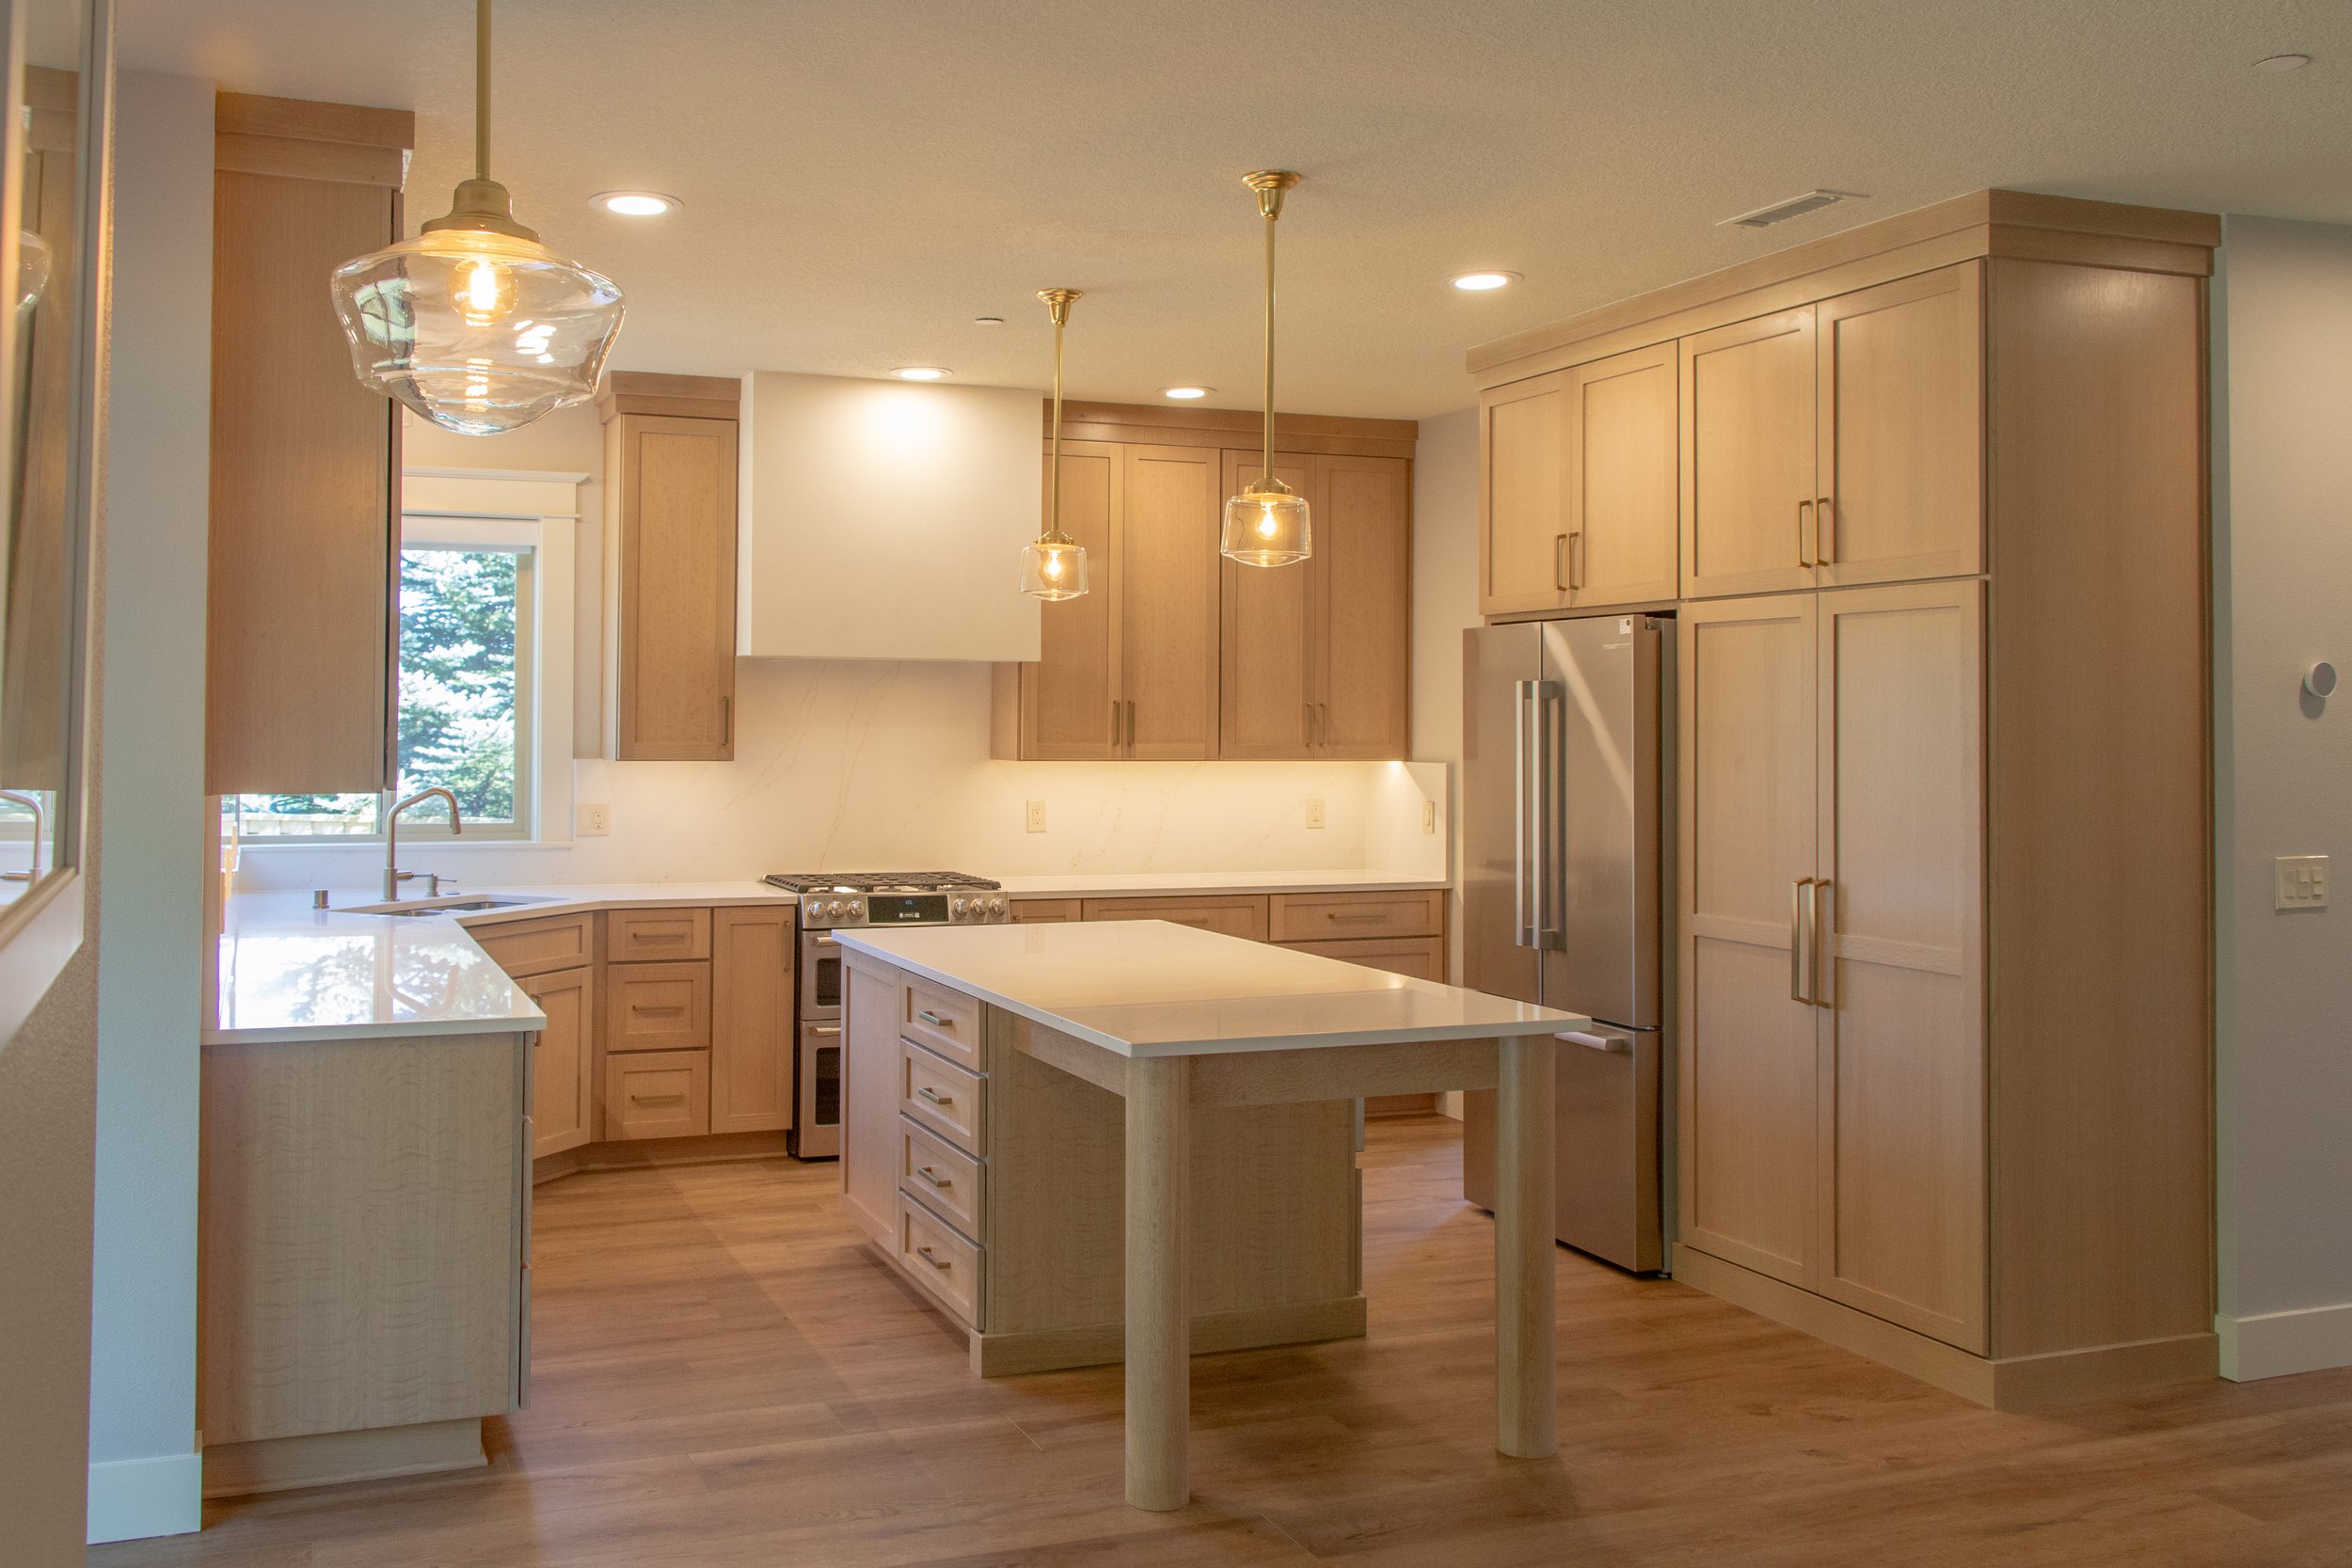
Before: Dated finishes, small kitchen footprint, and poor integration between living and dining spaces.
Challenges:
Limited cabinet storage and inefficient appliance layout.
Lack of natural flow between social zones.
Aging finishes and inadequate lighting.
Solution: We expanded the kitchen island into the kitchen-dining area for optimal counterspace and flow, while adding more storage, enabling us to keep the island feeling airy and the kitchen feeling spacious and uncluttered. Moreover, we added new cabinets and flooring to the living room to produce a cohesive design throughout the primary living areas.
Outcome: A spacious, modern main floor with cohesive design that feels totally new; ideal for entertaining, achieving the “open flow” today’s buyers expect.
Agent Takeaway: For older suburban homes in Tigard, Sherwood, or Wilsonville, there are subtle layout changes you ccan make to achieve the feeling of open-concept upgrades that deliver high ROI with moderate construction scope. Additionally, when thinking about a kitchen renovation, consider how it will feel relative to the overall flow of the primary living spaces- sometimes changes like adding matching flooring throughout the main floor can produce a sense of design cohesion that adds even more value to the project.
8.4 Armijo Project (Vancouver, WA)
Before: Odd kitchen layout with a diagonally oriented kitchen island, with outdated finishes, low lighting, and limited counter and cabinet space. No designated space for a kitchen table, and an odd flow into a living space.
Challenges:
Under an optimized kitchen layout
Flooring transitions created uneven visual flow.
Early 2000s finishes felt dark and dated.
Needed to add dining space and increase storage, while making the home feel more open and airy at the same time.
Solution: We removed the old kitchen island and installed an island perpendicular to the oven range to provide more of a U-Shaped flow. We moved the refrigerator to make space for added storage and enclosed the appliance in cabinets as well. We also removed an old butler's pantry to make space for additional counter space, custom cabinets, and a more optimized pantry space. Lastly, we introduced quartz countertops, new stainless steel appliances, a new dual-panel sliding door, and windows, implemented continuous LVP flooring across connected rooms, and painted to bring the entire living space an incredible renovation.
Outcome: A cohesive, open living space with elevated brightness and resale appeal.
Agent Takeaway: For Clark County listings, focus on showcasing how simple layout edits and new flooring unify space and light.
8.5 Knotts Project (Portland, OR)

Before: A beloved family home with strong suffered extensive water damage in the primary bedroom bathroom.
Challenges:
Preserve vintage charm while adding modern convenience.
Update electrical and plumbing without altering character.
Address lighting and circulation inefficiencies.
Solution: The water damage in our clients’ primary bathroom required a full teardown. Rather than simply replacing what was lost, we partnered with them to design a space that elevated both function and daily comfort. Through thoughtful spatial planning, we designed a layout that feels open yet intimate, with clear zones for every purpose. Custom features like the handcrafted vanity and floor-to-ceiling tile shower turned the space into a calm, highly functional retreat.
Outcome: A brand new primary bathroom with carefully designed storage and spaces. All new fixtures and well throughout design maintained vintage charm while achieving high functionality and durability to last.
Agent Takeaway: This home remodel case study in Portland shows how sensitive remodels preserve authenticity while boosting livability.
8.6 Key Lessons from these Case Studies
Structural Potential is Market Value: Buyers respond to ceiling height, sightlines, and daylight as much as square footage.
Livability Drives Offers: Open kitchens, consistent flooring, and improved storage deliver emotional and financial ROI.
Modernization Doesn’t Mean Loss of Character: Retaining wood trim, brick fireplaces, or Craftsman details matters in Portland’s older neighborhoods.
Data + Story = Credibility: Use these case studies during showings to help buyers see renovation potential, not just costs.
9. Agent Toolkit & Resources
9.1 Quick-Reference Checklists: Real Estate Agent Renovation Checklist
Buyer-Side Inspection Checklist
Check for visible foundation cracks or sloping floors.
Look for crawlspace vapor barrier and drainage.
Identify outdated electrical (K&T, cloth wire).
Test windows for seal failure or draft.
Review water heater and HVAC age (15+ years = replacement soon).
Note signs of moisture, mold, or staining in attic/crawlspace.
Confirm presence of permits for visible remodels.
Seller Pre-Listing Prep Checklist
Power-wash and repaint trim/siding if the paint is older than 10 years.
Replace cracked grout and caulk in kitchens/baths.
Service HVAC and plumbing fixtures.
Repair soft decking or railing gaps.
Verify permits on prior work to prevent inspection delays.
10. Partnership Opportunities
10.1 How Amplified Renovations Supports Real Estate Partners
At Amplified Renovations, our mission is simple: to provide honest, high-quality, and well-managed home renovation work to homeowners across the Pacific Northwest. We are here to listen to our clients, talk through questions, work with homeowners’ tastes, budget, and unique homes to provide home upgrades that will lead to years of happiness, improved functionality, and ROI. We will not hesitate to help homeowners and real estate professionals transform homes with clarity, confidence, and craftsmanship.
We work directly with agents across Portland-Metro, Lake Oswego, Beaverton, Vancouver, Camas, and Clark County to:
Provide detailed, line-item estimates for buyers evaluating remodel potential.
Offer pre-listing walk-throughs for sellers preparing to renovate before sale.
Advise on scope prioritization; distinguishing must-do repairs from ROI-driven upgrades.
Deliver modern, livable designs that respect the region’s architectural character.
Our team’s dual licensing (Oregon CCB #233674 | Washington GC #AMPLIRC761RP) allows seamless support on both sides of the river, handling everything from kitchen remodels to additions, ADUs, and full-scale home renovations.
10.2 Partnering With Amplified Renovations
If you’re a real estate professional representing buyers or sellers in the Portland–Vancouver area:
For Listing Agents: Partner with us for pre-listing evaluations and cost estimates that help you price confidently and reduce inspection renegotiations.
For Buyer’s Agents: Introduce your clients to Amplified for design consultations or feasibility walkthroughs, helping them visualize upgrades before they commit to a home.
For Brokerages & Teams: We are happy to schedule an in-office training or digital workshop on home remodeling in the Pacific Northwest to build confidence in talking about rough costs, timelines, ROI, and a deeper understanding of projects in general.
10.4 The Amplified Advantage
Local Insight: Deep experience with Portland and Vancouver’s older homes, climate challenges, and permitting nuances.
Transparent Process: Clear timelines, detailed estimates, and frequent communication.
Craftsmanship + Design: Every remodel balances structural integrity with aesthetic vision.
Education-First Approach: We equip agents and clients with the knowledge to make confident, informed decisions.
10.6 Final Word
Portland and Vancouver homes are full of character, but they’re also full of quirks, and there are a lot of home renovation contractors in Portland and Vancouver to work with. When agents and remodelers work together, those quirks become opportunities.
By using this guide or partnering with Amplified Renovations, you’re helping clients envision the best version of every home they see. Together, we’re not just renovating spaces; we’re amplifying what makes the Pacific Northwest home.
11 Frequently Asked Questions
11.1 General FAQs
What should real estate agents look for when showing older Portland or Vancouver homes?
Agents should check for sloped floors, water stains, foundation cracks, outdated electrical wiring, and missing vapor barriers in basements or crawlspaces. These are common in pre-1970s wood-framed homes.
What home upgrades have the best ROI in the Pacific Northwest?
Kitchens, bathrooms, and exterior painting consistently deliver the strongest returns. Opening up floor plans and adding functional living areas like basement ADUs also rank high with buyers.
How long do remodels usually take in the Portland/Vancouver area?
Most kitchen or bathroom remodels take about 2–3 weeks once work begins. The construction time for larger projects like full home remodels or additions typically ranges from 4 to 10+ weeks. Design and permitting times can also be 6-14 weeks, but we schedule our work and place material orders to minimize our construction time and set clear expectations for homeowners.
11.2 Structural & Systems FAQs
What are the warning signs of foundation issues?
Look for step cracks in stem walls, sagging floors, sticking doors, and efflorescence or moisture in the crawlspace. Serious displacement should be reviewed by a structural engineer.
How can you tell if a house has knob-and-tube wiring?
Cloth-wrapped wiring in basements or attics and two-prong outlets are strong indicators. Full rewiring typically costs $14K–$30K in vintage homes.
Do all basements in Portland need vapor barriers?
Yes, especially in homes built before the 1980s. A 6-mil vapor barrier prevents moisture intrusion, mold, and wood decay in PNW humidity.
11.3 Renovation & Cost FAQs
How much does it cost to remodel a kitchen in Portland or Vancouver?
A pull-and-replace kitchen remodel averages $25K–$50K. Full custom remodels can exceed $100K depending on layout changes, cabinetry, and finishes.
What drives remodel costs the most in this market?
Cabinetry, tile, and custom millwork are top cost drivers. Structural changes, waterproofing, and permit/engineering fees can also raise budgets quickly.
How do current tariffs and labor shortages affect remodel prices?
Material tariffs and a tight labor market are pushing prices 4–9% higher in 2025, especially for imported cabinetry and finish materials.
11.4 Permitting & Local Process FAQs
How long does it take to get a building permit in Portland, Oregon?
Simple trade permits may be issued within a week, sometimes 2 weeks. Full structural or addition permits typically take 6–14+ weeks, depending on workload and design overlays.
What’s the permit timeline in Vancouver or Clark County, WA?
Vancouver’s Quick Permit process can typically approve non-structural trade permits in about 1 week. Full structural or ADU permits generally take 6–14+ weeks. Vancouver typically has a more consistent and predictable permit turnaround time, compared to Portland.
Do unpermitted remodels affect a home sale?
Yes. Lenders and appraisers may flag non-permitted work, potentially delaying financing or lowering appraised value. Buyers aren’t legally required to re-permit, but disclosure is recommended.
11.5 ADU & Additions FAQs
Can I build a detached ADU in Portland?
Yes, most residential zones allow one detached ADU up to 800 sq ft. It must complement the main home’s style and roof pitch and will require full building and trade permits.
What are the ADU zoning regulations in Vancouver or Clark County?
Zoning is generally more flexible; owner-occupancy requirements are often waived. Detached and attached ADUs are permitted up to 1,200 sq ft, depending on lot size.
11.6 Agent-Specific FAQs
How can agents use this guide during showings?
Use it as a talking point tool, flag visible issues early, reference realistic remodel timelines, and connect buyers with qualified contractors for cost estimates.
Should agents recommend remodels before listing?
Only when the ROI justifies it, projects like kitchen updates, bathroom refreshes, and exterior paint often have the highest ROI.
Can Amplified Renovations help verify home repair or remodel estimates?
Yes. Amplified offers free consultations and can review inspection findings or cost assumptions for buyers and sellers.