
Kitchen Remodel Process: What to Expect from Start to Finish
If you are planning a kitchen remodel, one of the most important things to understand is how the process actually works. A deeper understanding of how a kitchen remodel is executed, from planning to the final walk-through, will enable you to speak the same language as a general contractor and prioritize your budget and decision-making throughout the process.
Most homeowners focus on design ideas and materials, which is certainly imperative for the finished product. But the success of an on-time and on-budget kitchen remodel depends on how each phase of the project is planned and executed. The end product and how it serves your home and family are clearly the most important parts, but how you get there and how you feel about the kitchen remodel process are often overlooked.
This home remodeling guide breaks down what happens during a kitchen remodel, so that you know what to expect from the initial planning phase through final installation and walk-through.
What to Expect During a Kitchen Remodel
Kitchen renovation steps follow a structured sequence where each step builds on the previous one. The order of operations matters, and small decisions early in the process can have a significant impact on both cost and execution later.
A typical kitchen remodeling process includes:
Planning and layout development
Material selection
Pre-construction preparation
Demolition
Framing and rough-ins
Drywall and surface preparation
Flooring coordination (variable, depending on scope)
Cabinet installation
Countertops and backsplash
Appliance and fixture installation
Final walkthrough
When this process is planned correctly, construction becomes predictable and efficient.
Step 1: Planning and Layout Development
Every kitchen remodel starts with defining how the space will function.
This includes:
Kitchen layout and workflow planning
Appliance placement
Cabinet configuration and storage
Structural considerations
If walls are being moved or layouts are changing, those decisions are finalized here.
This is also where tradeoffs begin. Layout decisions directly impact cost, complexity, and timeline. A clear plan at this stage eliminates uncertainty later in the project.
The level of planning required for a kitchen remodel depends on the complexity of the kitchen remodeling project, your budget, and your preferences. For example, if you are not changing the layout of your kitchen, want to save money on kitchen design fees, and do not need full-blown drawings and 3D renderings, you can leverage a builder-guided selection process where materials and design are still very intentionally considered, but you don’t get a 3D rendering of what the final kitchen will look like.
However, if planning design for your dream kitchen is imperative for you or you are making significant layout or structural changes that require structural engineers and permits, floor plans, and 3D renderings might be required.
Step 2: Material Selection
Once the layout is defined, materials need to be selected and aligned with the overall plan.
This includes:
Cabinets
Countertops
Backsplash tile
Flooring
Trim
Windows and doors
Appliances (dishwasher, range, hood, disposal, wine cooler, etc.)
Light fixtures
Sink and plumbing fixtures
Cabinet hardware
Paint color
Drywall finish
Material selection is not just about aesthetics and lead times. These decisions affect installation order, scheduling, and how different components interact with each other.
For example, flooring selection impacts when the flooring is installed relative to the cabinets. Appliance selection impacts cabinet layout and electrical planning. Countertop material affects fabrication timelines and installation sequencing.
Delays or uncertainty in this phase are one of the most common reasons kitchen remodels fall behind schedule.
Step 3: Pre-Construction Preparation
Before demolition begins, the project must be fully coordinated and ready to execute.
This includes:
Ordering all materials
Scheduling subcontractors
Finalizing permits and approvals (if required)
Confirming project sequencing and timeline
Permit requirements depend on the scope of the project. Structural changes, electrical updates, and plumbing modifications often require permits and inspections.
In many cases, permitting can occur alongside planning or material selection (as soon as we have the layout finalized, we will begin pulling permits), which helps prevent delays once construction begins.
This phase is where a well-managed project separates itself from a disorganized one. When materials are ready and approvals are in place, construction can move continuously without gaps between phases.
Step 4: Demolition
Before the demolition phase begins, the jobsite must be prepared for dust control and the safety measures. This usually includes a final check of the plans to see what is to be demolished and sealing off the area(s) of your home where work is being done to control dust and debris.
The construction phase officially begins with the removal of the existing kitchen.
This usually includes:
Cabinets, countertops, and backsplash
Appliances
Flooring (if being replaced)
Wall finishes
Walls (if load-bearing temporary support is used)
Old plumbing/electrical (if necessary)
Demolition turns your kitchen into a blank slate, preparing the space for rough-ins, structural, and mechanical work. The demo material is removed from your property and disposed of, and the jobsite is vacuumed. It is important to note in the planning phase if you want to keep any current appliances, as those are disposed of during this phase as well.
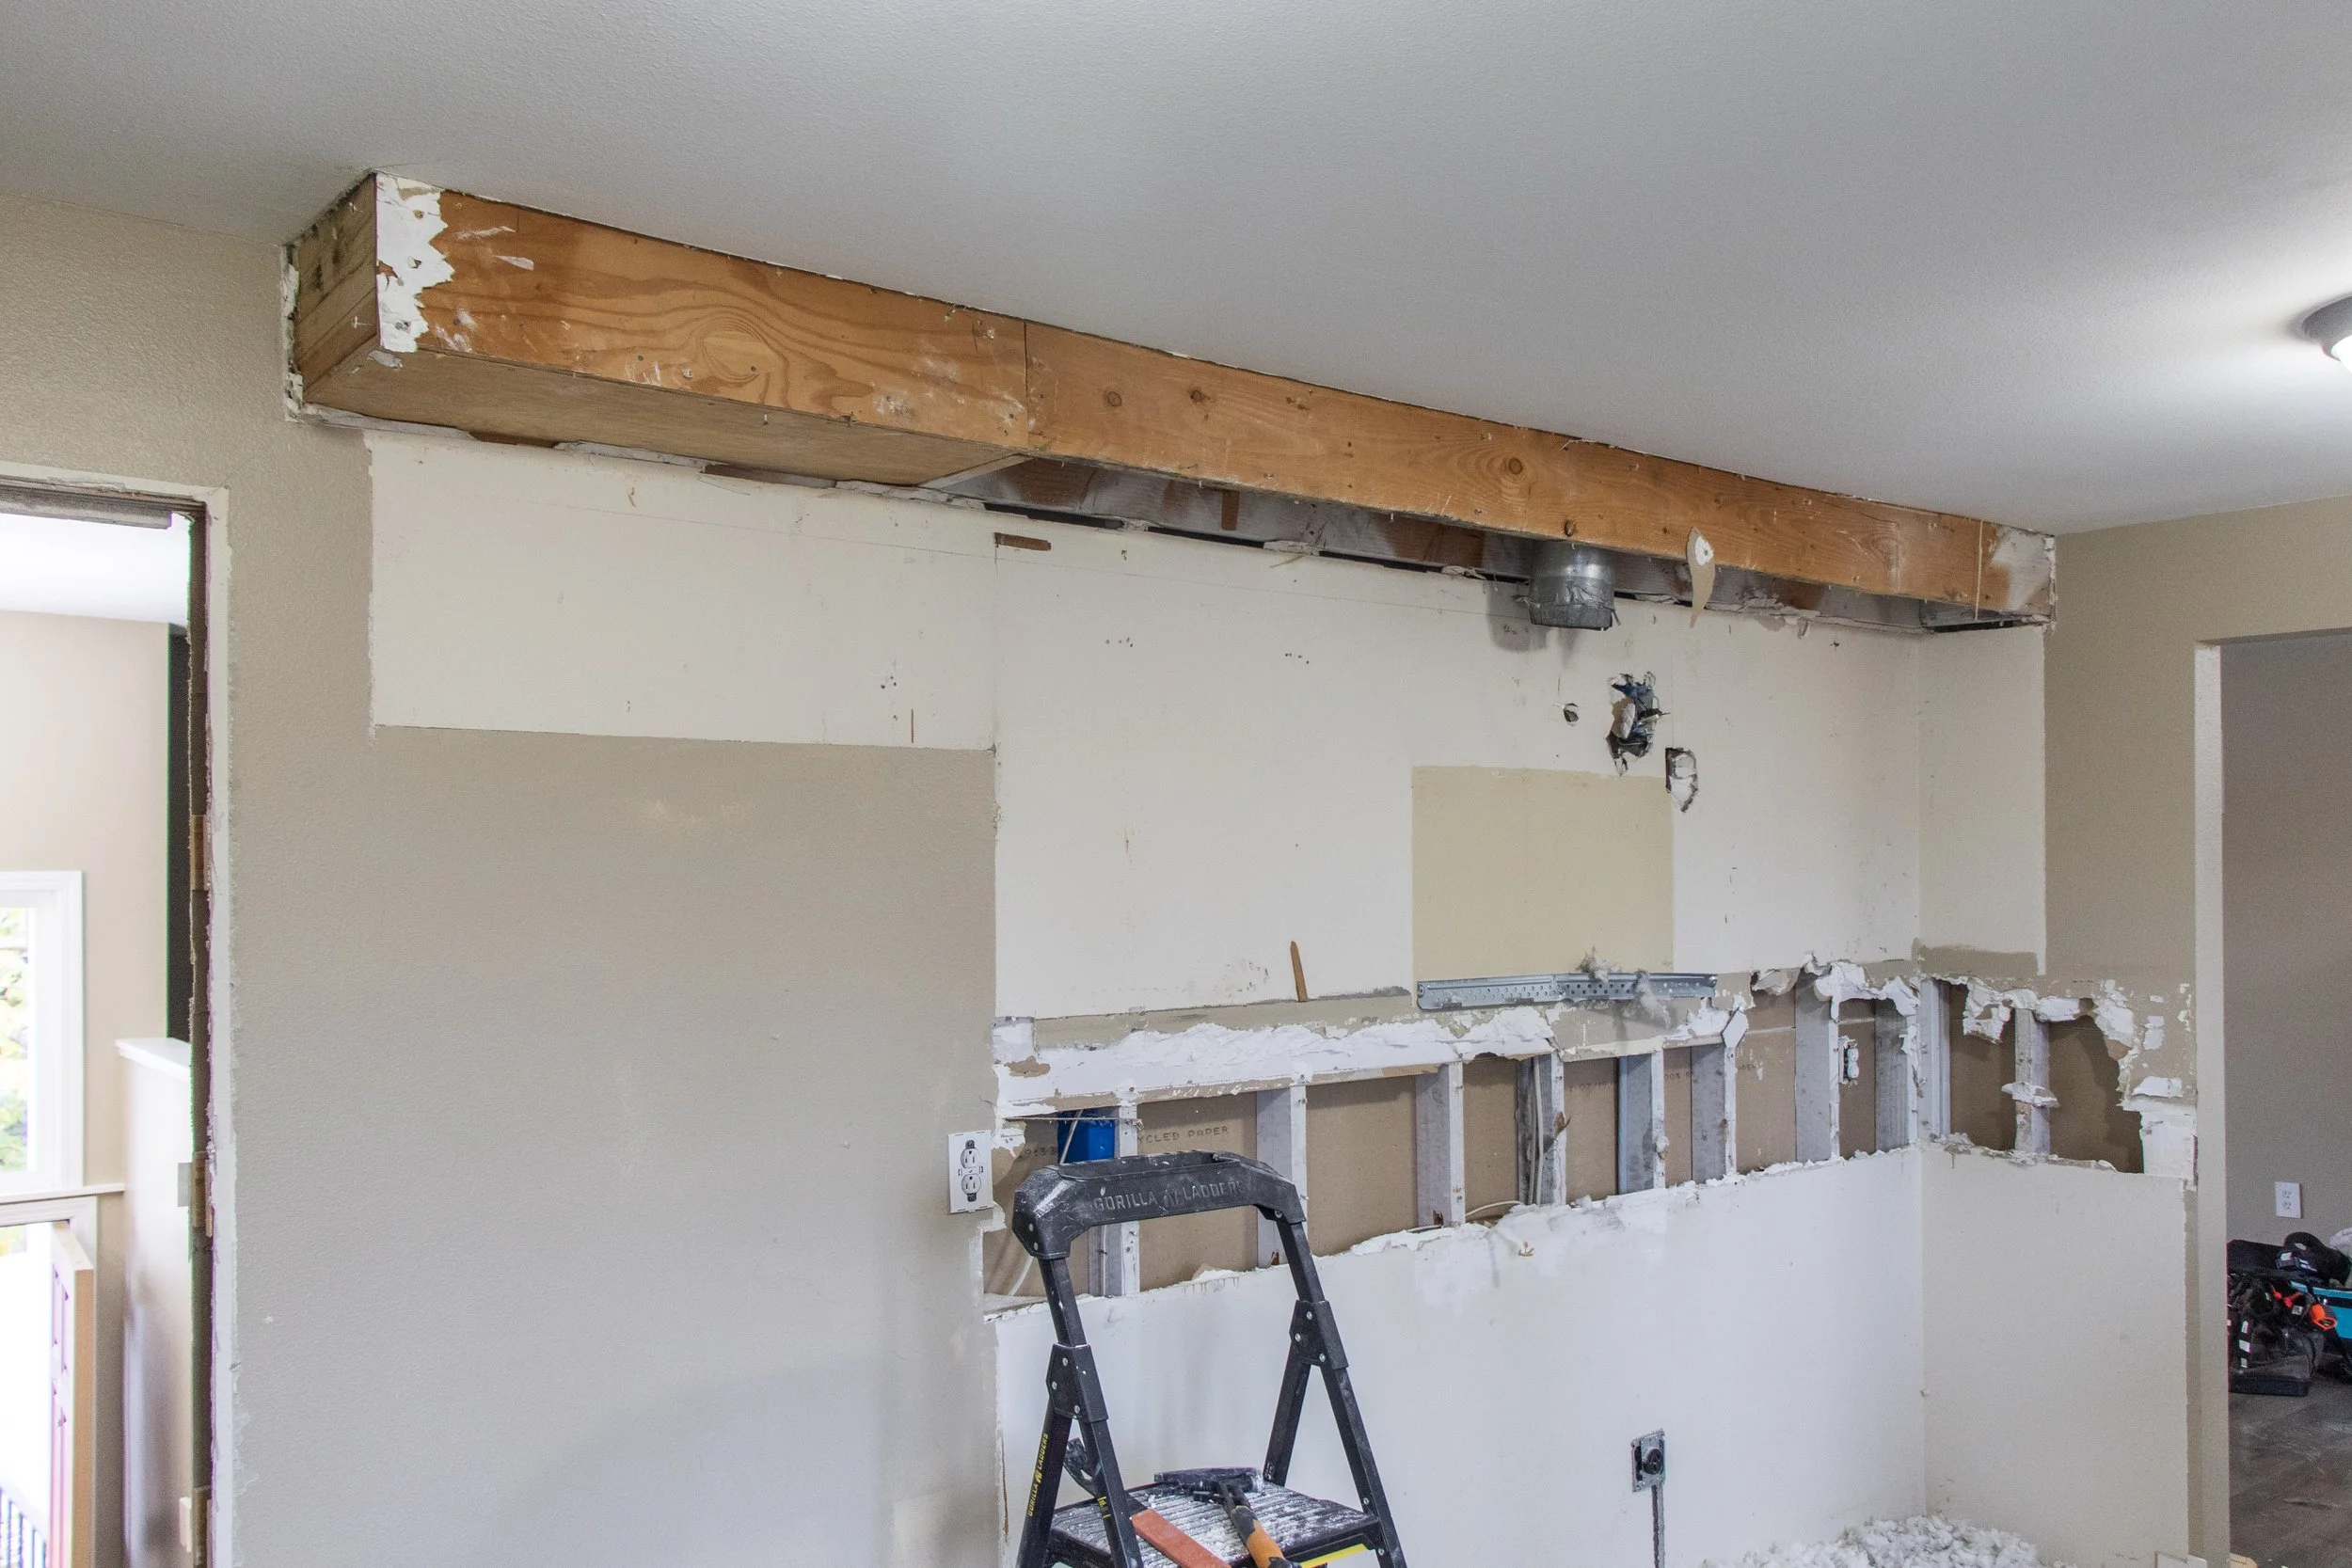
Step 5: Framing and Rough-Ins
If the layout is changing, or we are removing load-bearing walls, framing, and structural adjustments are completed first.
Once framing is in place, rough-in work begins:
Plumbing lines
Electrical wiring
Gas lines, if applicable
Venting for hood systems
Framing often needs to be completed before rough-ins so that plumbing and electrical can be installed in the correct locations.
This phase ensures all systems are properly positioned before walls are closed.
Step 6: Drywall and Surface Preparation
After rough-ins and framing are completed and inspected, surfaces are prepared for finishes. Proactively scheduling inspections during the rough-in phase is essential to ensure your project stays on schedule.
This includes:
Drywall installation
Taping and finishing
Surface preparation for cabinets and tile
At this stage, the space starts to feel like a kitchen again.
Step 7: Flooring Installation and Coordination
Flooring installation in a kitchen remodel depends on both the material being used and the scope of the project.
In many full kitchen renovations, flooring is installed before cabinets to create a clean, continuous surface and reduce the need for detailed cuts around cabinet bases.
This approach is common with:
Tile
Hardwood
Glue-down engineered flooring
Installing flooring first allows for better alignment, a cleaner finish, and more flexibility for future layout changes.
However, there are important exceptions.
For floating floor systems such as luxury vinyl plank or laminate, flooring is typically installed after cabinets. These materials need space to expand and contract, and placing cabinets on top of them can lead to performance issues over time.
There are also project-specific situations where flooring may be installed after cabinets, including:
Matching existing flooring in adjacent spaces
Material delays that require schedule adjustments
Reducing material usage and waste
Because of these variables, flooring is not a fixed step in every kitchen remodel. It is coordinated based on the material type, layout, and overall construction plan.
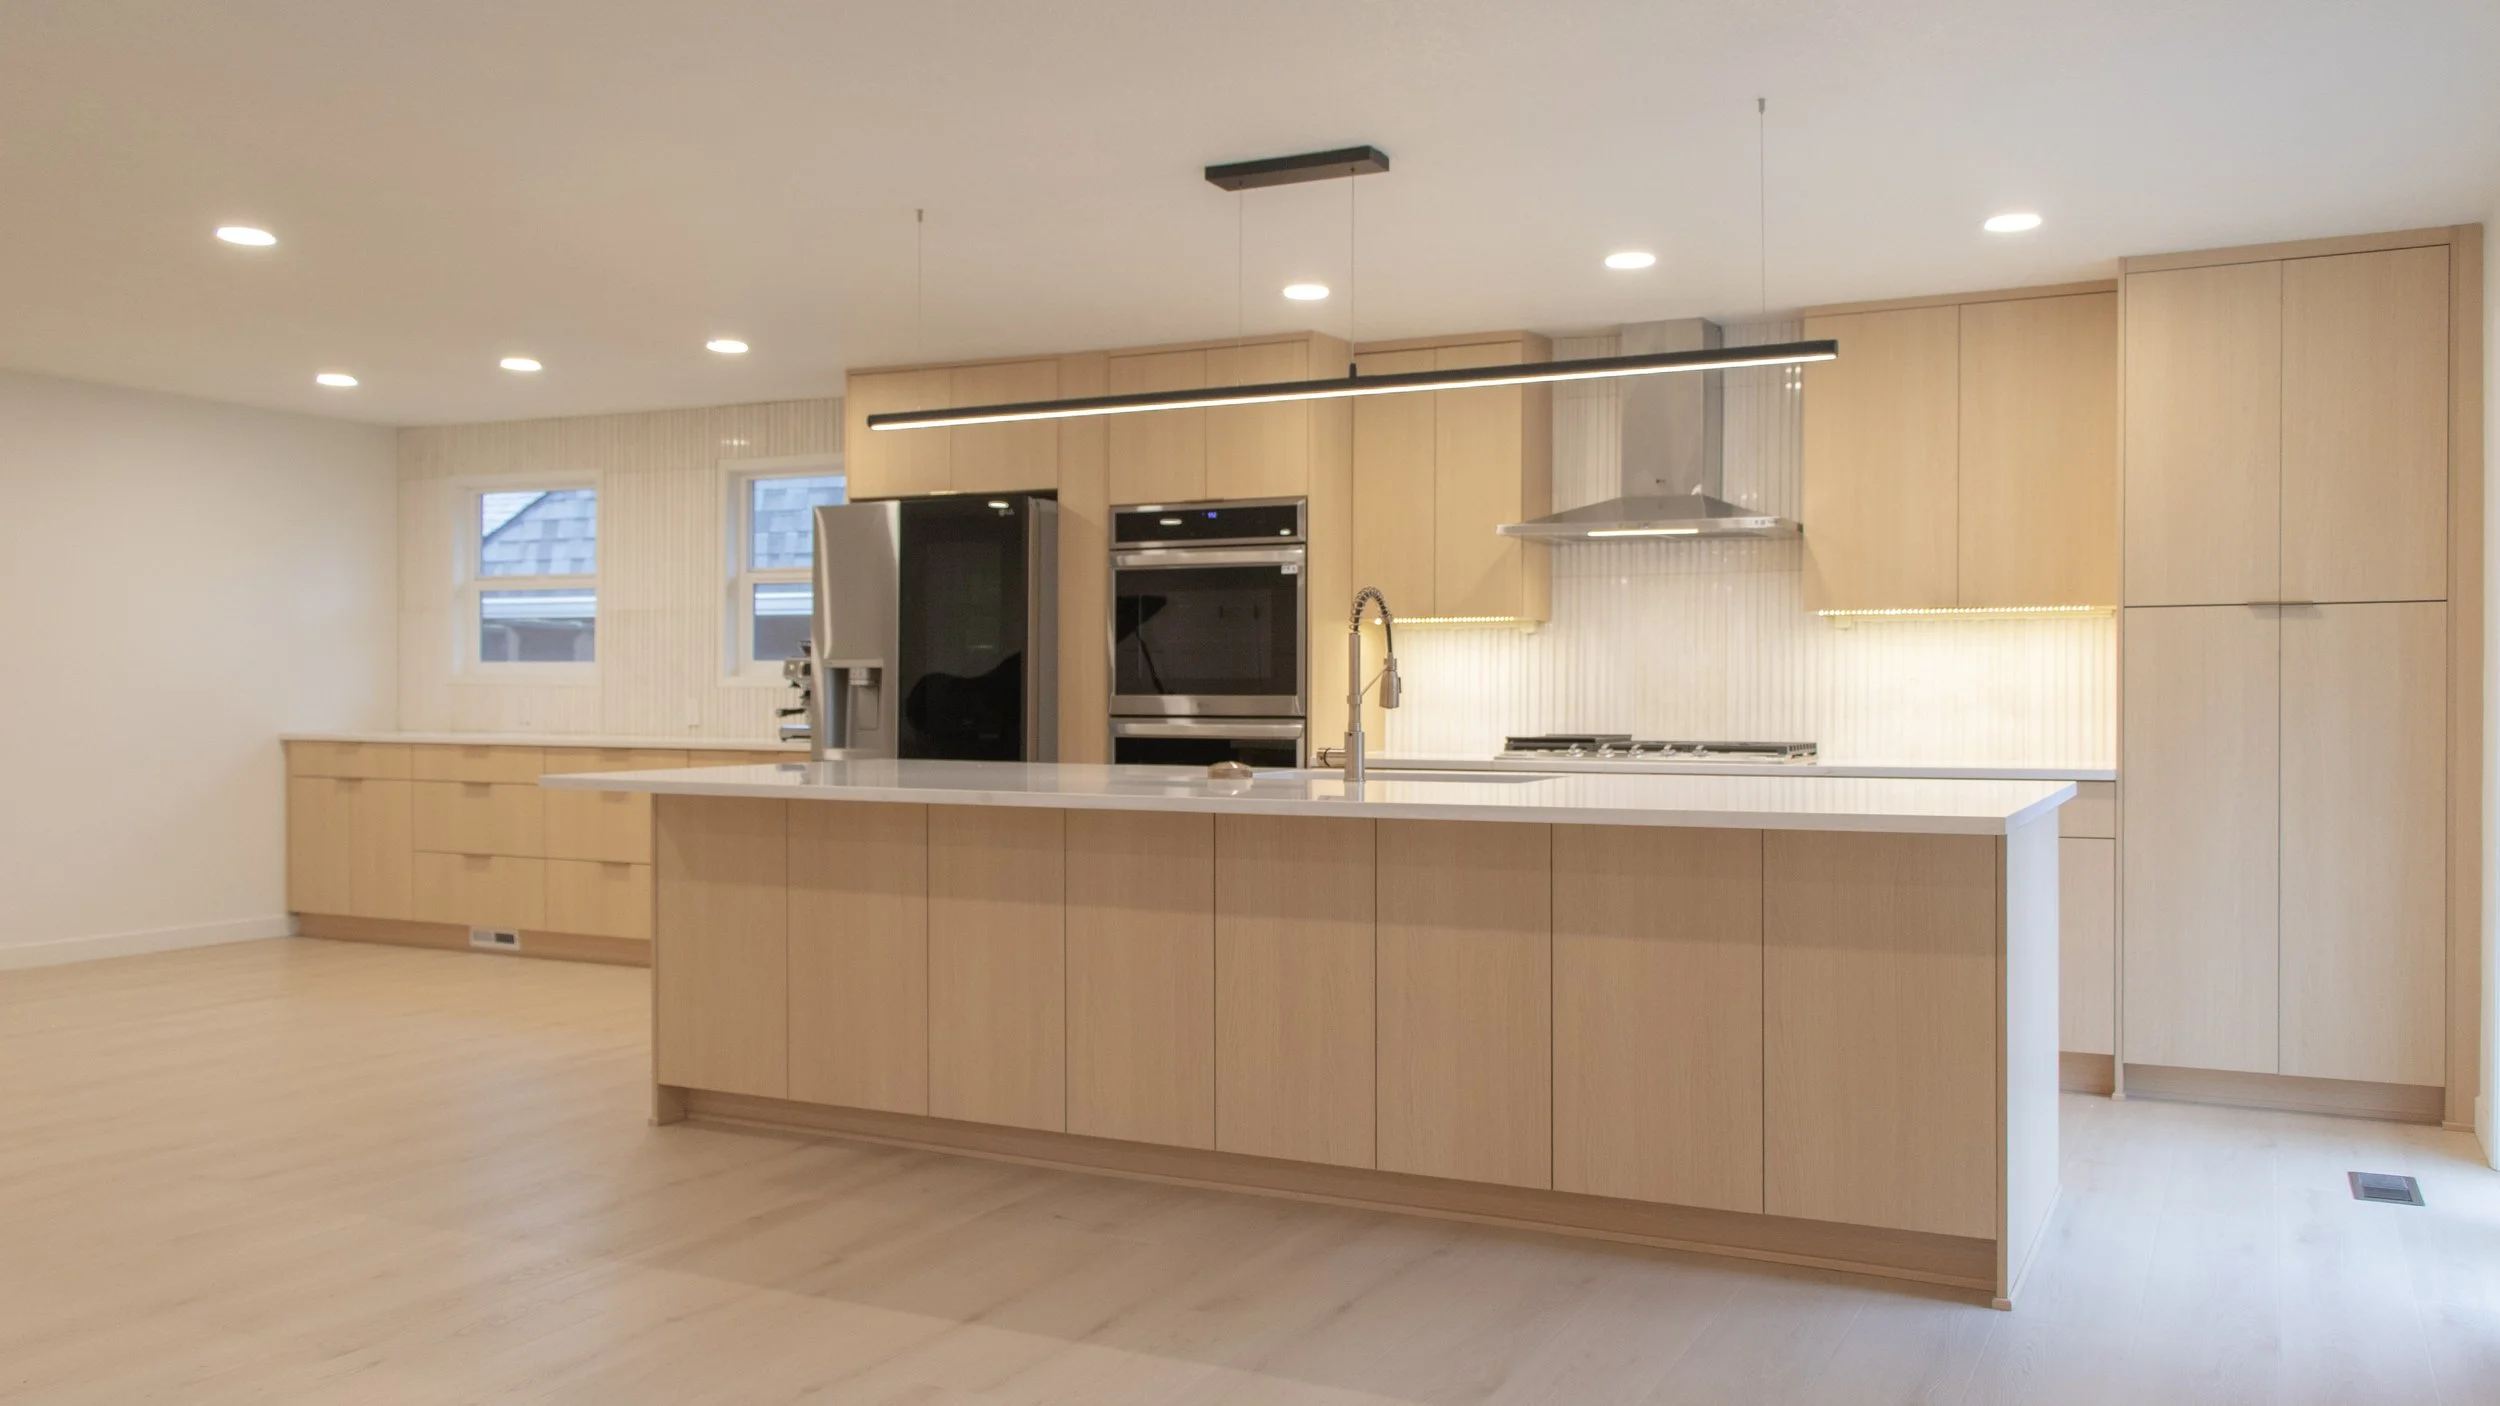
Step 8: Cabinet Installation
Cabinets are the foundation of the kitchen layout and must be installed with precision.
This includes:
Base cabinets
Wall cabinets
Pantry units
Cabinet installation determines alignment for countertops, appliances, and finishes. Small errors at this stage can impact multiple downstream steps.
Step 9: Countertops and Backsplash
After cabinets are installed, countertops are measured, fabricated, and installed.
Once countertops are complete, backsplash installation follows.
This phase includes:
Countertop installation
Backsplash tile
Sealing and finishing
Countertop fabrication can introduce delays if measurements or material selections are not finalized early.
Step 10: Appliance and Fixture Installation
Once major finishes are complete, appliances and fixtures are installed and connected.
This includes:
Range and oven
Refrigerator
Dishwasher
Hood system
Sink and faucet
Garbage disposal
Appliance installation is coordinated with cabinet dimensions, electrical placement, and plumbing connections that were established earlier in the project.
There are a few important sequencing details to be aware of.
Undermount sinks are typically installed during the countertop installation process, as they are mounted to the underside of the countertop before it is set in place. Drop-in sinks, on the other hand, are installed after countertops are complete.
Most appliances, including dishwashers and ranges, are installed toward the end of the project once cabinets, countertops, and finishes are in place. While these appliances are planned and roughed in earlier, final installation happens during the finishing phase.
Clearances and elevations are critical during this step. Floor height, cabinet height, and countertop thickness all impact how appliances fit within the space, which is why these decisions are made early in the process.
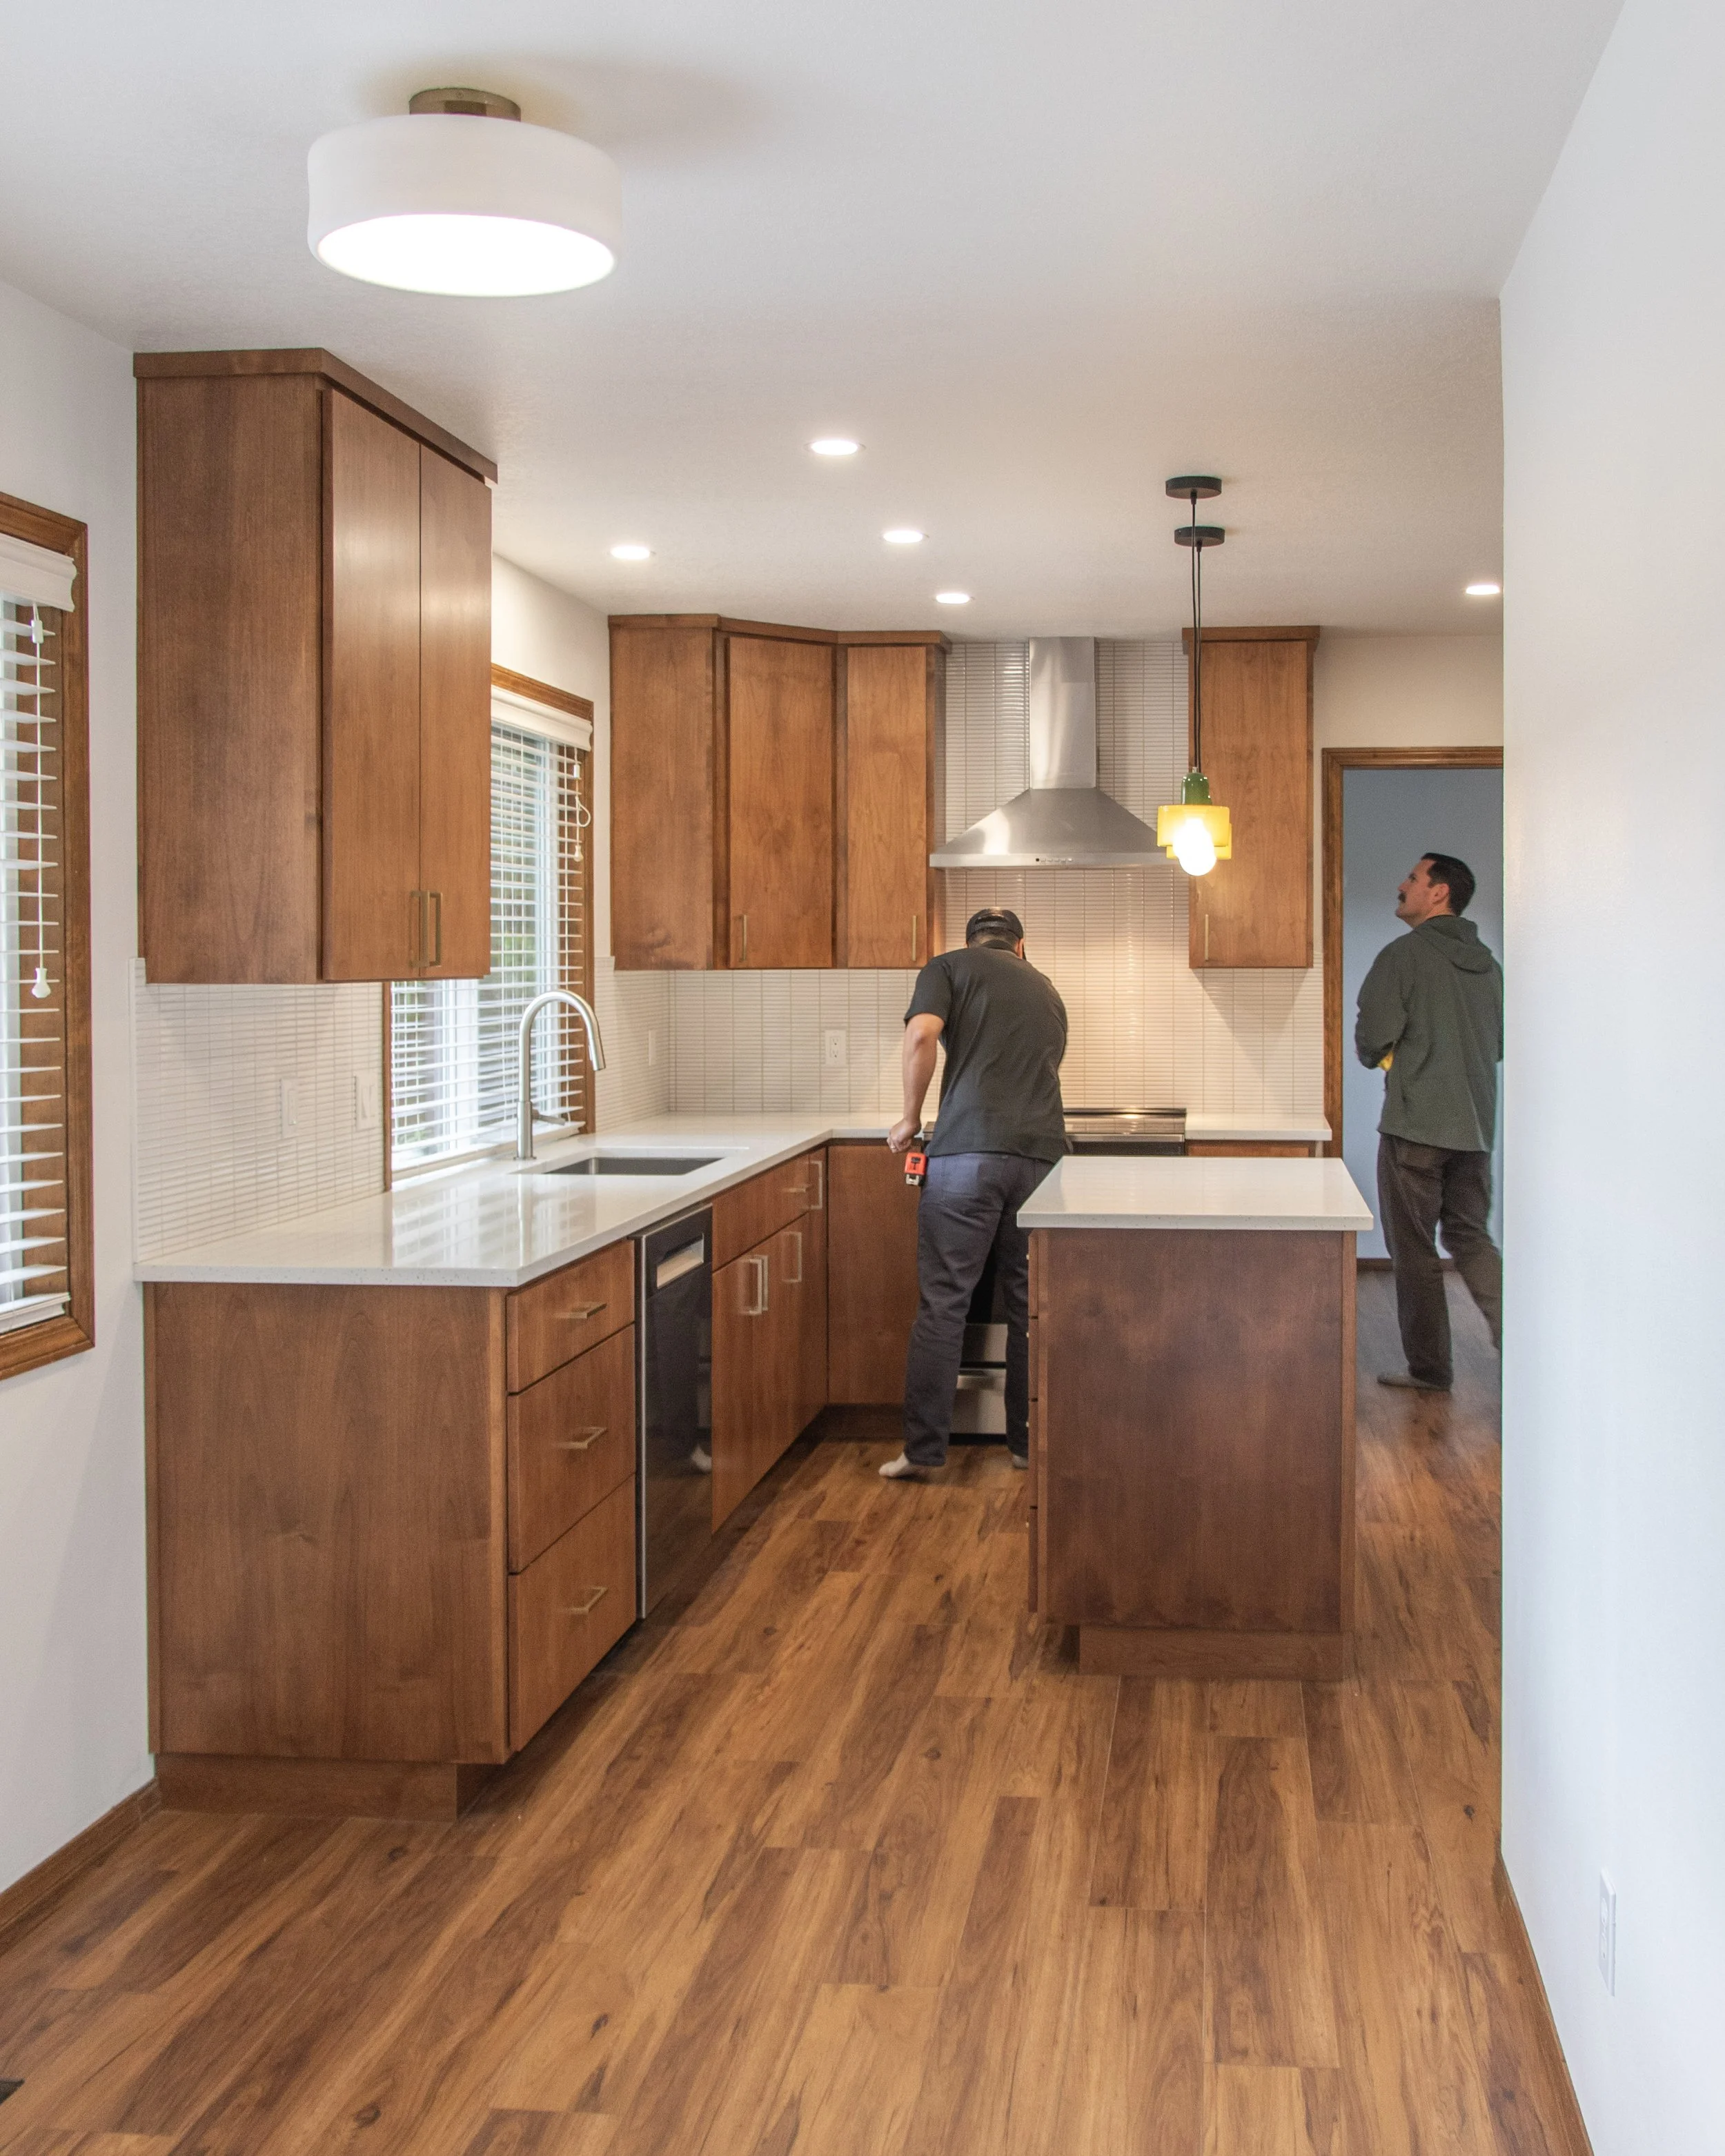
Step 11: Trim, Paint, and Final Details
The final stage focuses on completing the visual and functional details of the kitchen.
This includes:
Trim and finish carpentry
Painting
Hardware installation
Final adjustments
These details bring the entire project together.
Step 12: Final Walkthrough and Adjustments
The final step in the process is reviewing the completed project.
This includes:
Checking all installations and finishes
Testing appliances and fixtures
Addressing final adjustments
This step ensures the kitchen is fully functional and meets expectations before the project is complete.
Where Kitchen Remodels Typically Break Down
Kitchen remodels rarely run into construction issues. Most problems originate earlier in the process.
Common breakdown points include:
Making decisions during construction
Delayed material selections or inspection scheduling
Changing layout mid-project
Poor coordination between trades
A well-defined process eliminates these issues and allows the project to move efficiently. The relationship that your general contractor has with their subcontractors also plays a critical role in delay mitigation. If subcontractors are willing to go the extra mile when there is a breakdown in the project, jobs can often finish on time or only a few days late. But if subcontractors significantly delay their trade when a job hits a speed bump, it can result in a cascading scheduling event that delays jobs more significantly.
How the Process Impacts the Overall Project
The kitchen remodel process and timeline are directly connected.
When materials are selected early and the project is fully planned before construction begins, the build phase can move quickly and predictably.
If you want a breakdown of how long each phase typically takes, you can review our full kitchen remodel timeline guide.
Considerations: The Kitchen Remodeling Process in Portland and Vancouver Homes
Kitchen remodels in Portland and Vancouver often involve additional considerations:
Older homes may require electrical or plumbing updates
Structural changes may require permits
Inspection timing can affect sequencing
Working with a contractor familiar with local conditions helps ensure the process runs smoothly and avoids unnecessary delays.
Final Thoughts
Understanding the kitchen remodel process allows you to make better decisions and avoid common pitfalls. Each step plays a critical role, and the success of the project depends on how well those steps are planned and executed.
When the process is handled correctly, construction becomes efficient, predictable, and far less stressful. Potential project timeline breakdowns (which can happen) can even feel like minor speed bumps instead of a massive delay.
If you are planning a kitchen remodel in Portland or Vancouver, starting with a clear process is the best way to ensure your project stays on track from start to finish.